PVE安装使用指南基于PVE8
PVE镜像下载
1、在浏览器输入以下网址下载pve的iso安装镜像。
https://www.proxmox.com/en/downloads
2、点击download进行下载。
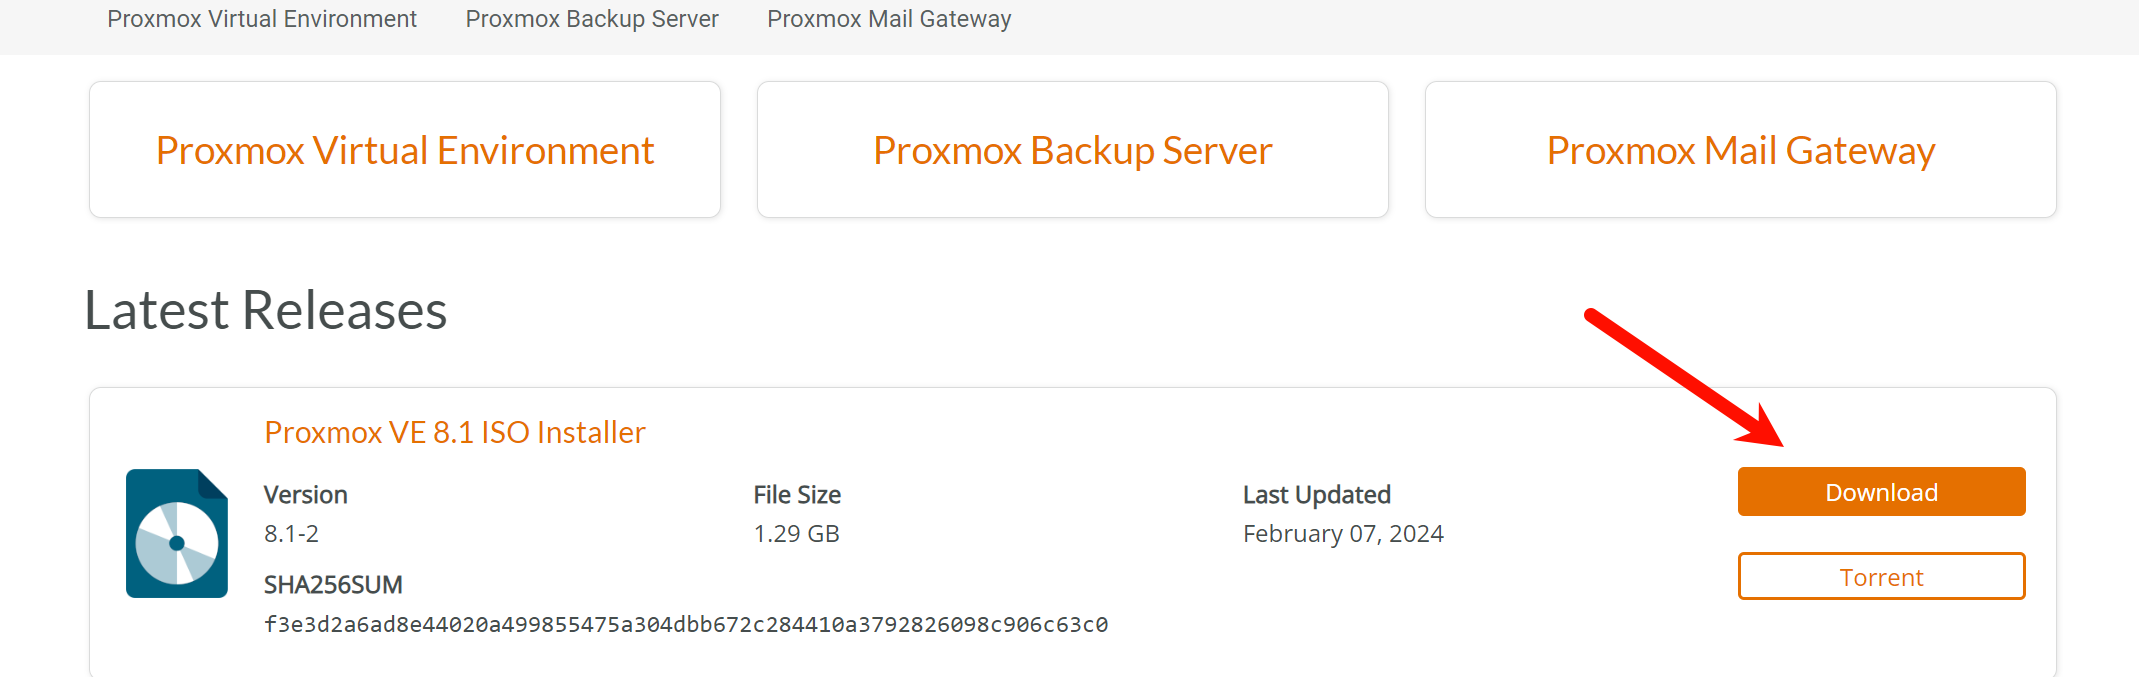
3、最新的pve8.1-2镜像大小为1.2GB,接下来制作引导U盘。

引导U盘制作
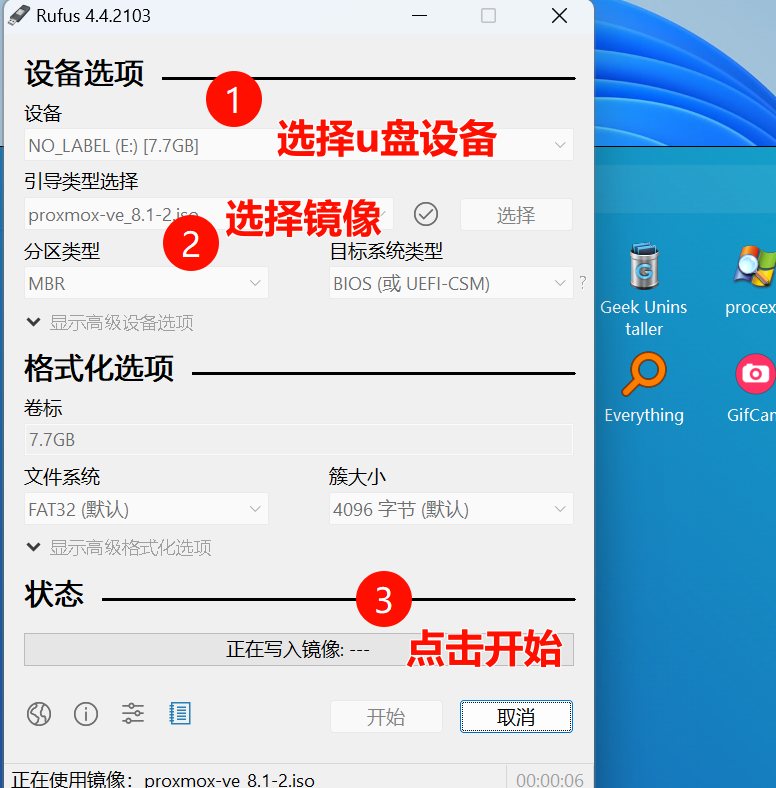
1、首先下载写盘工具,本文使用的写盘工具为Rufus,下载地址为https://rufus.ie/downloads/,选择最新版本的下载。

2、下载完成后直接双击运行,无需安装,设备中选择U盘,引导类型选择PVE镜像,然后点击开始,注意U盘中的原有数据会被格式化,重要数据记得备份。
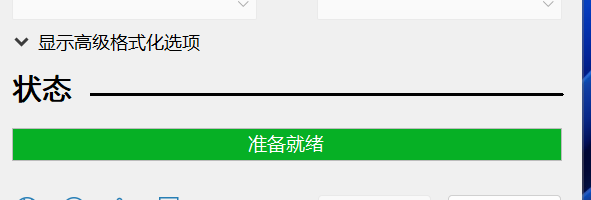
3、当状态为准备就绪时,表示U盘写入成功,拔下U盘插入需要安装的机器的USB接口中(台式机推荐后置USB接口)
PVE安装
1、打开主机电源,不断按键盘F12按键(不同主机的U启动按键不同,请自行百度或者询问卖家)进入PVE安装页面,选择第一个Install Proxmox VE (Graphical),按回车。

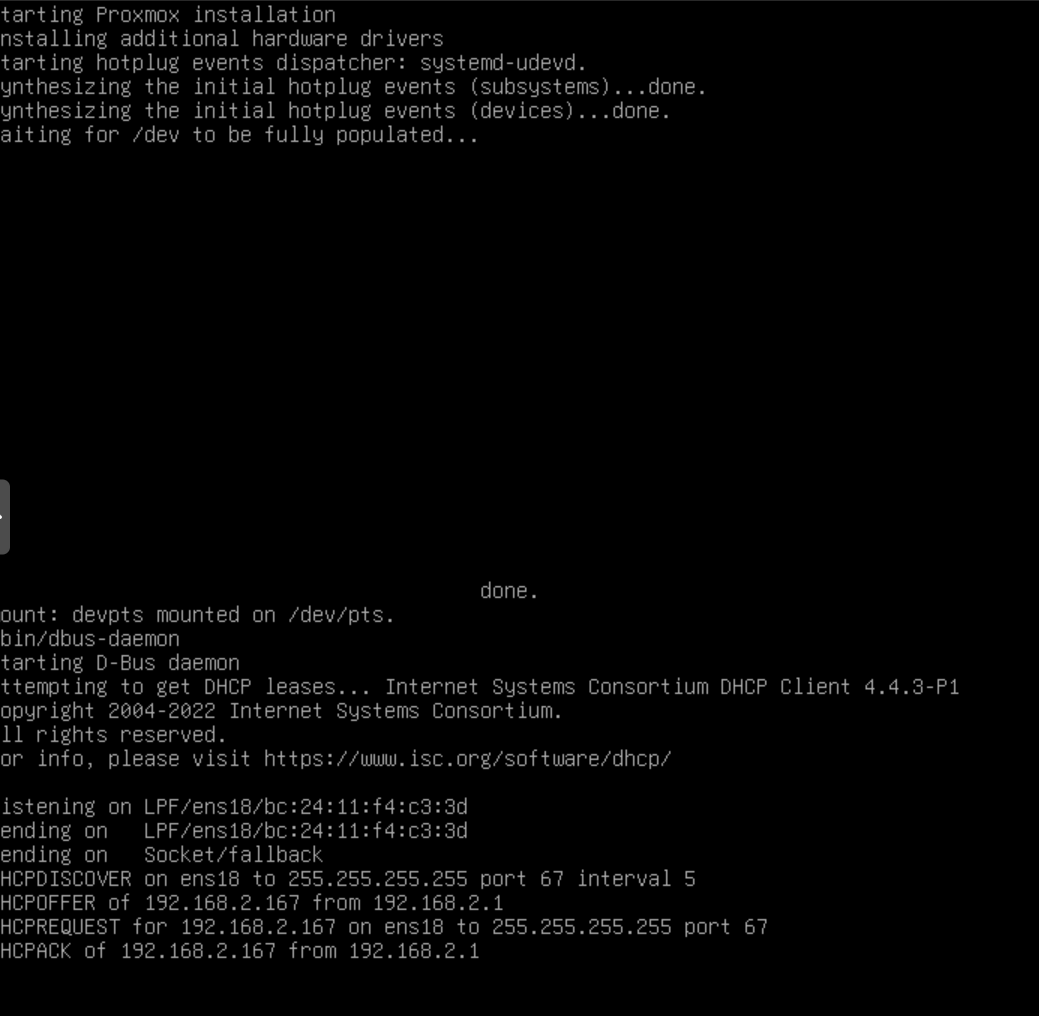
2、 页面会进入如下的跑代码阶段,跑码时间看机器配置,跑码期间不要动键盘鼠标。
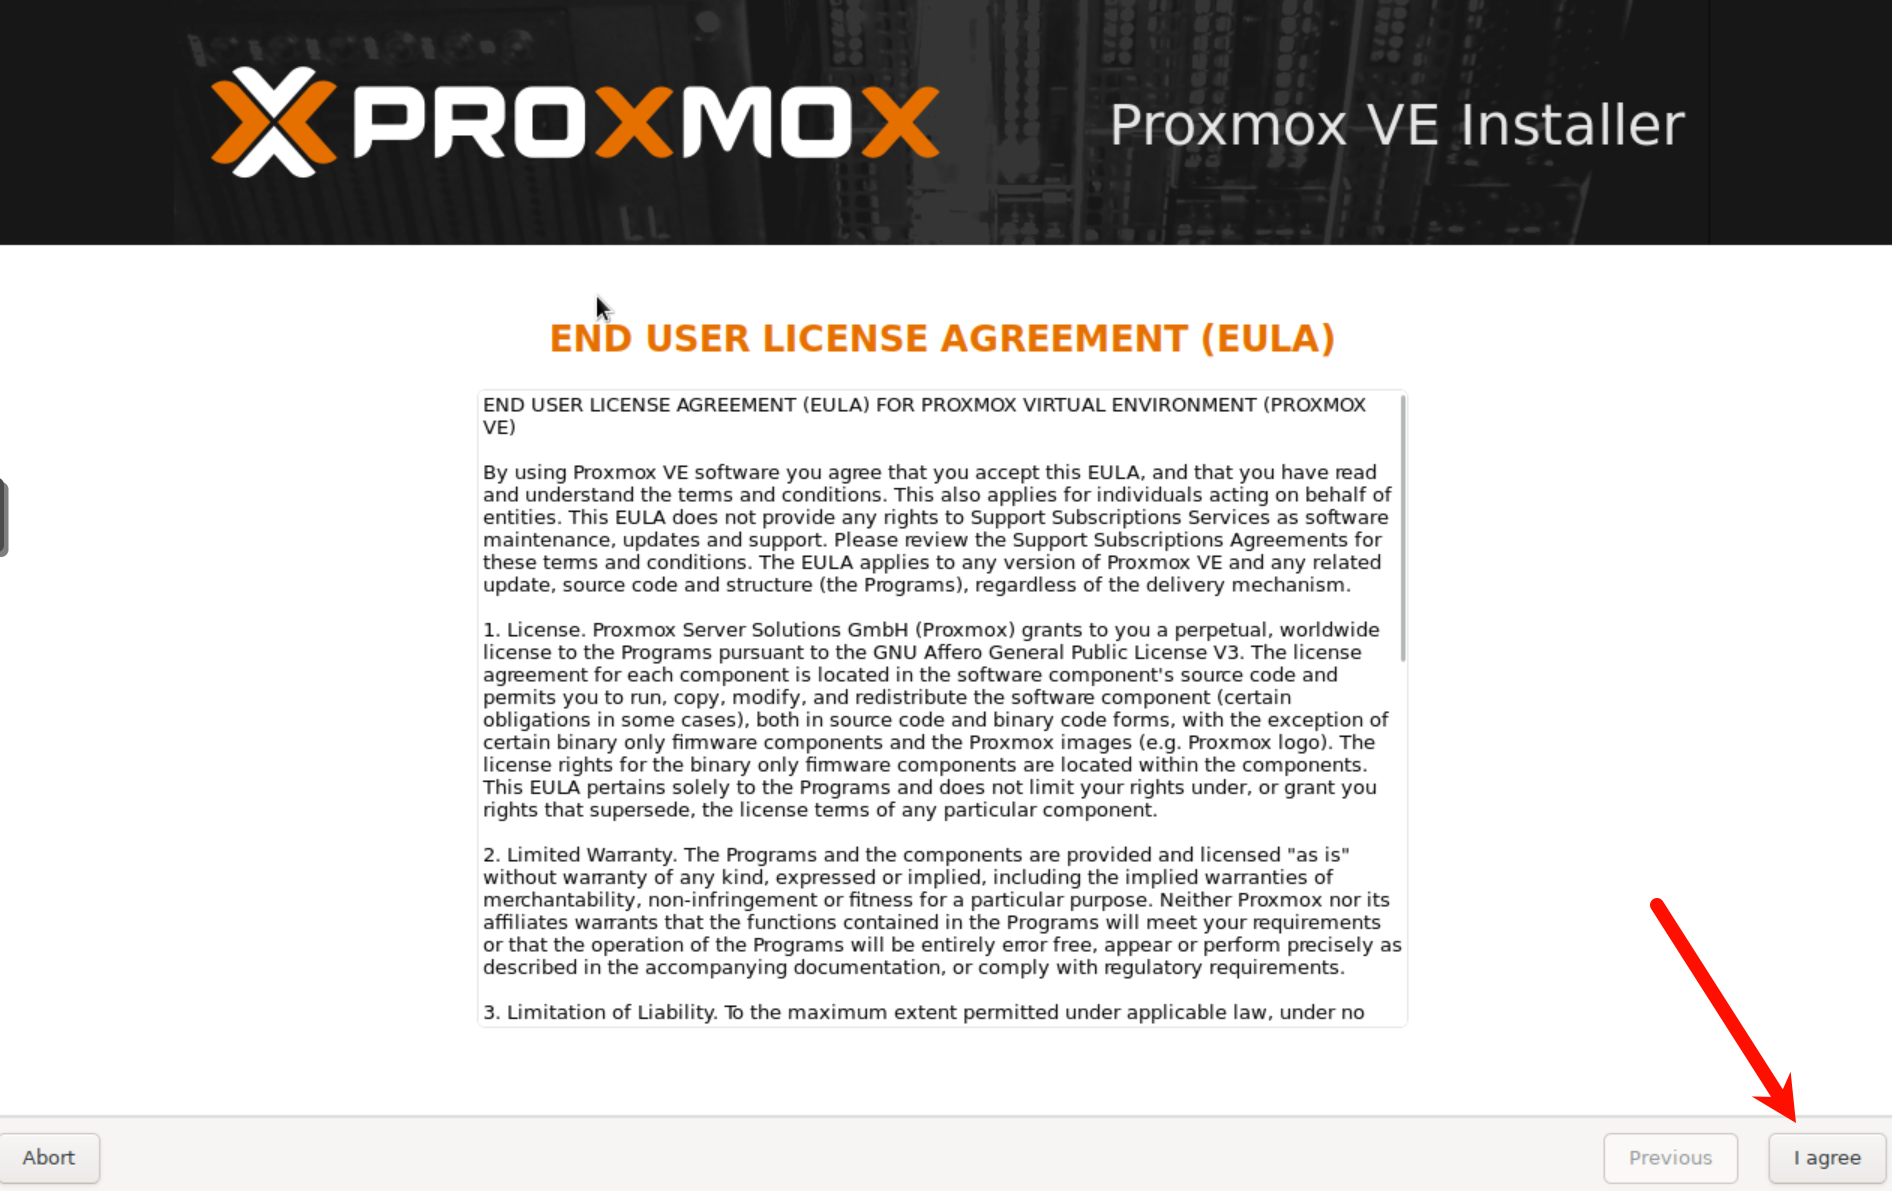
3、进入下面页面安装正式开始,首先使用协议页面点击 I agree(我同意)。
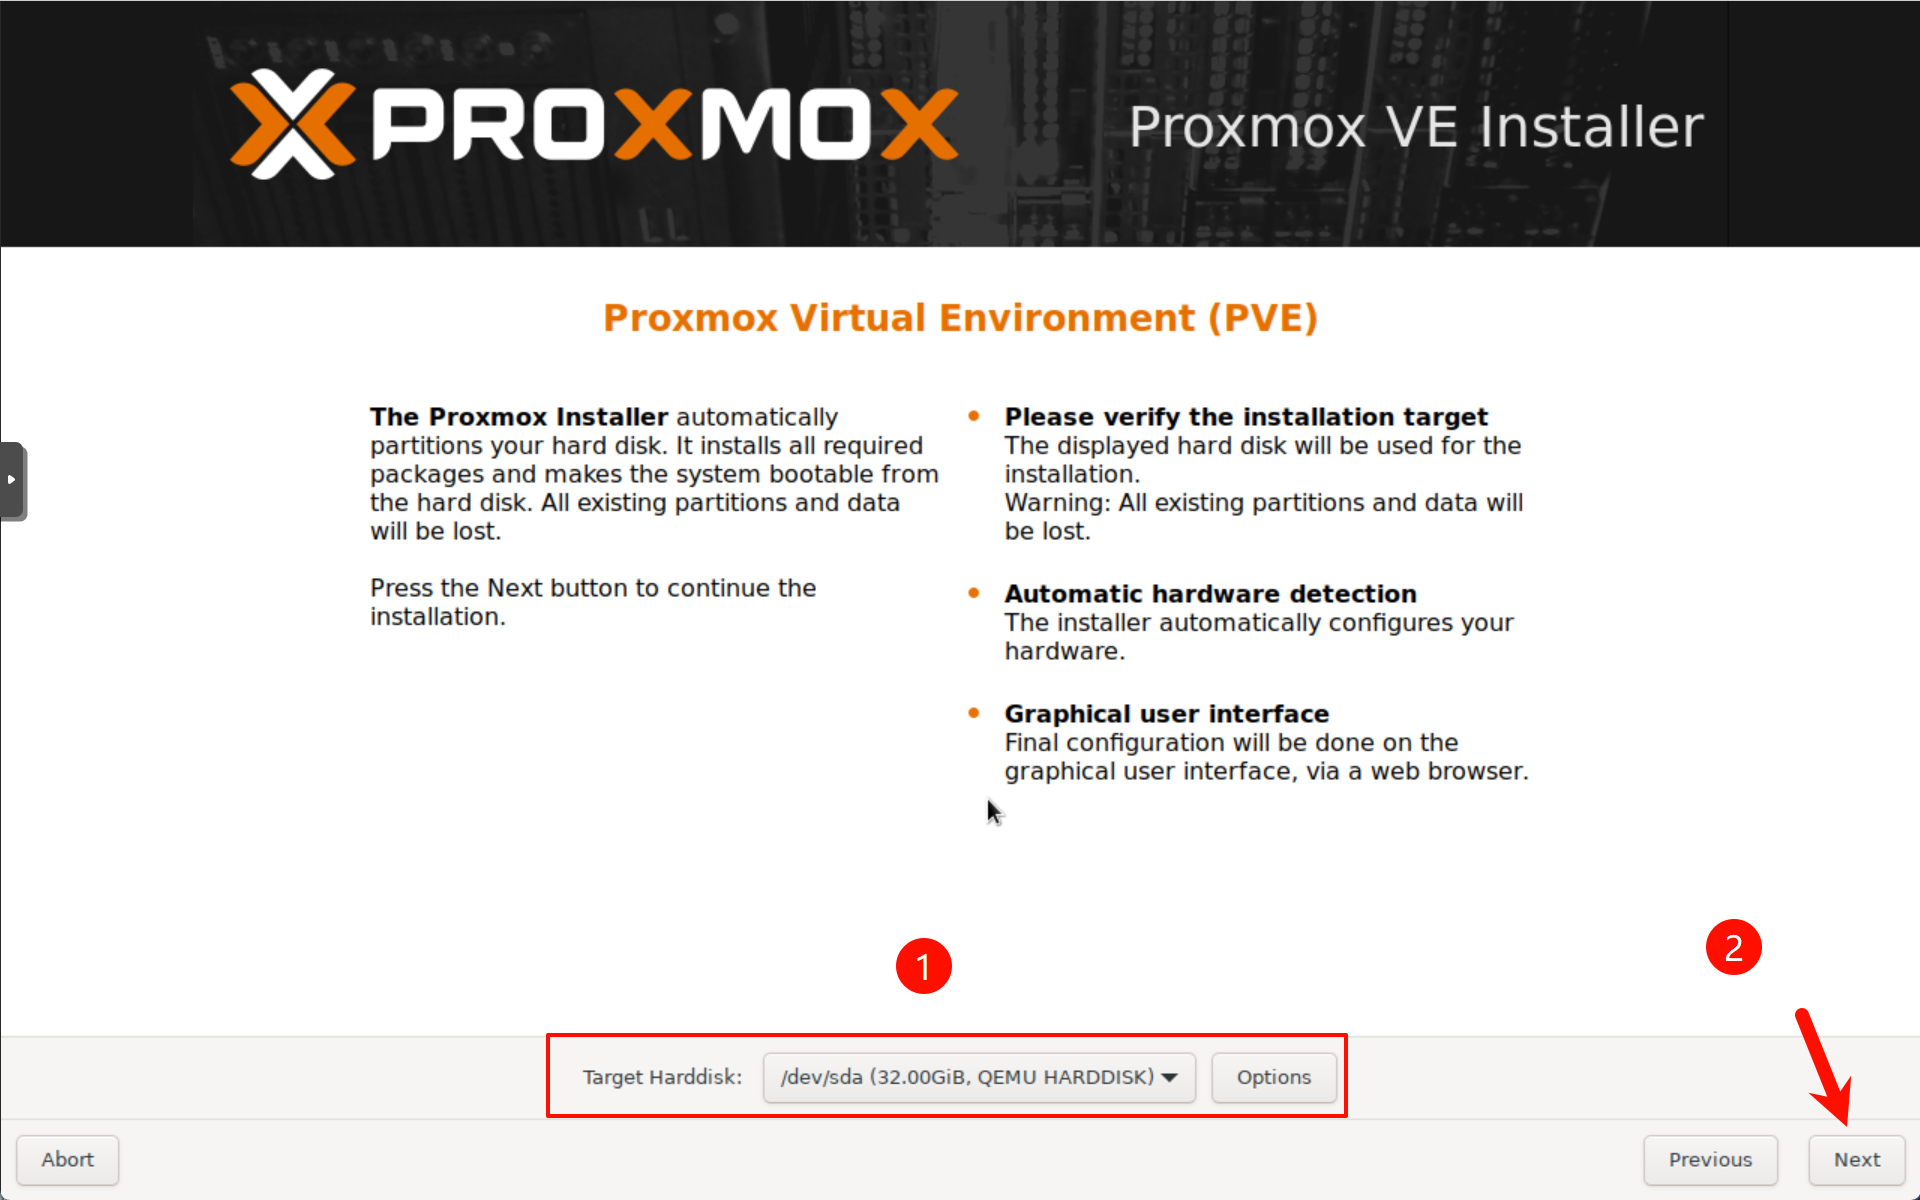
4、选择pve安装的硬盘,然后继续点击Next(下一步)。
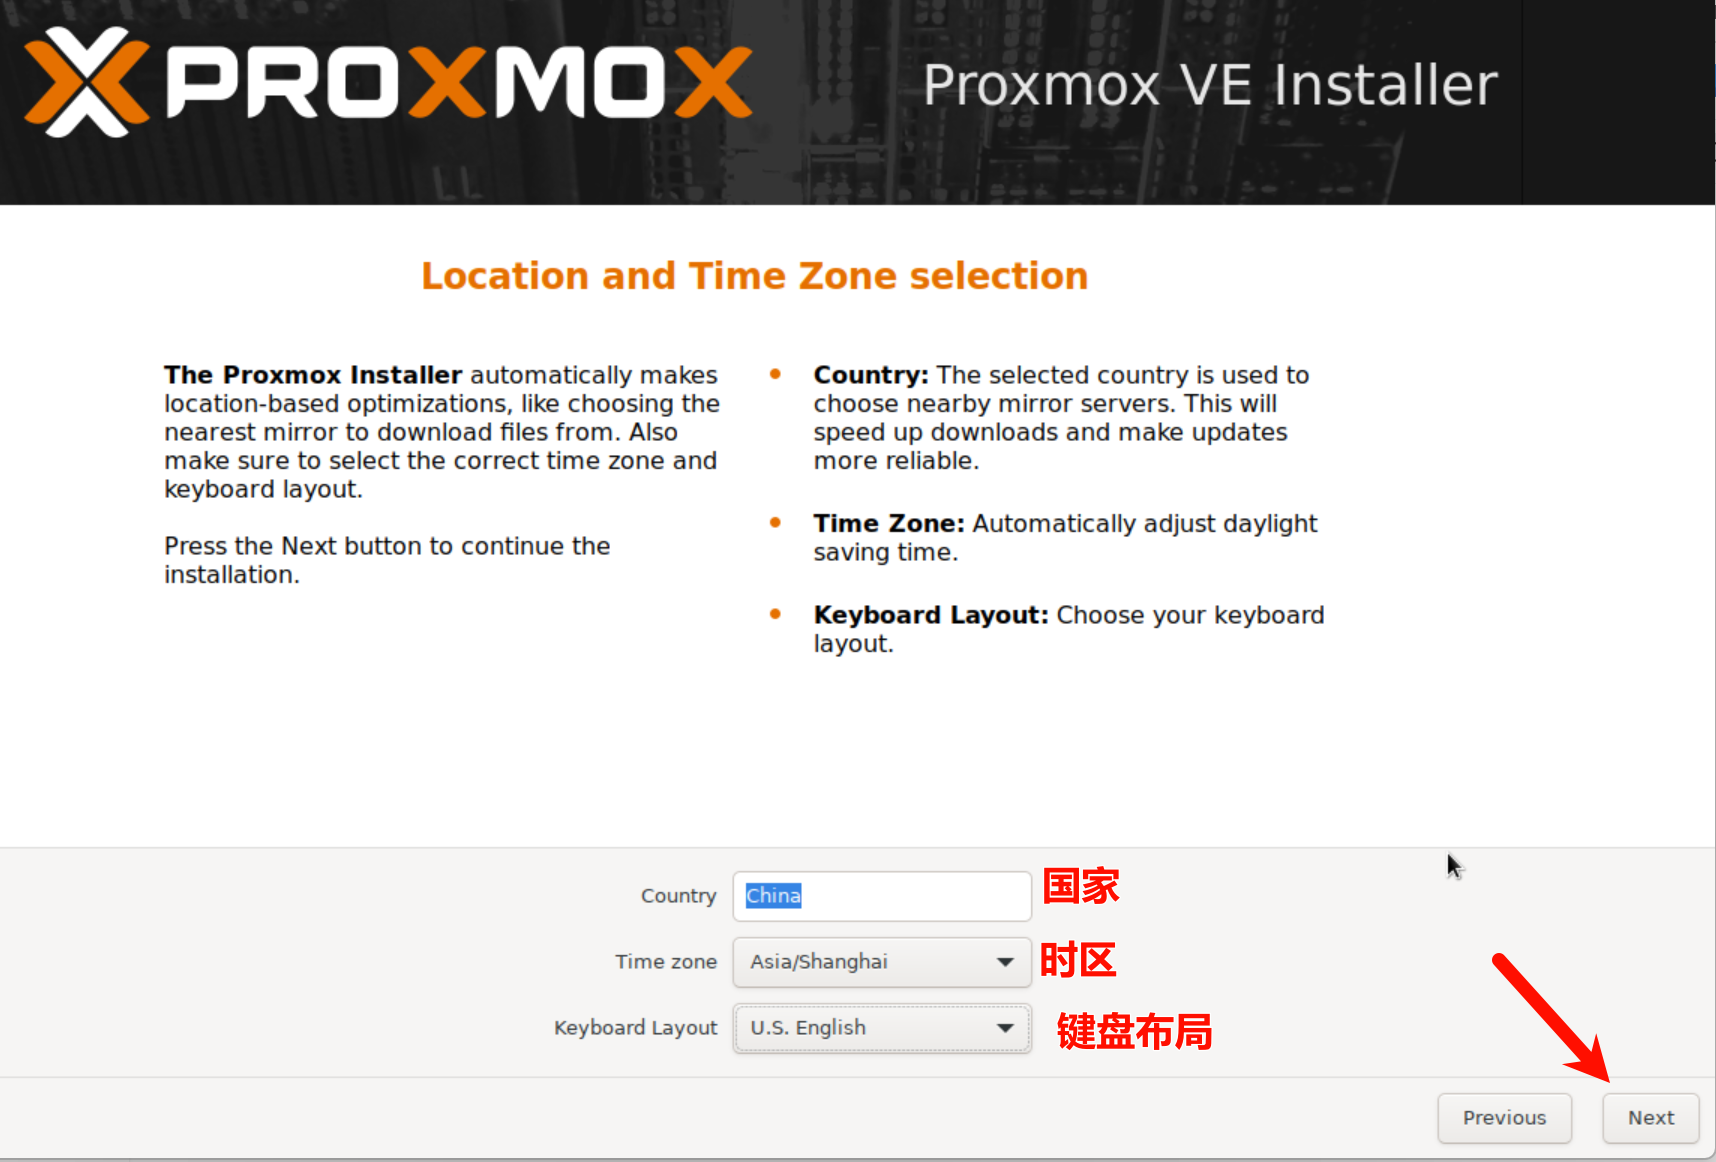
5、设置国家、时区、键盘布局,然后点击Next(下一步)。
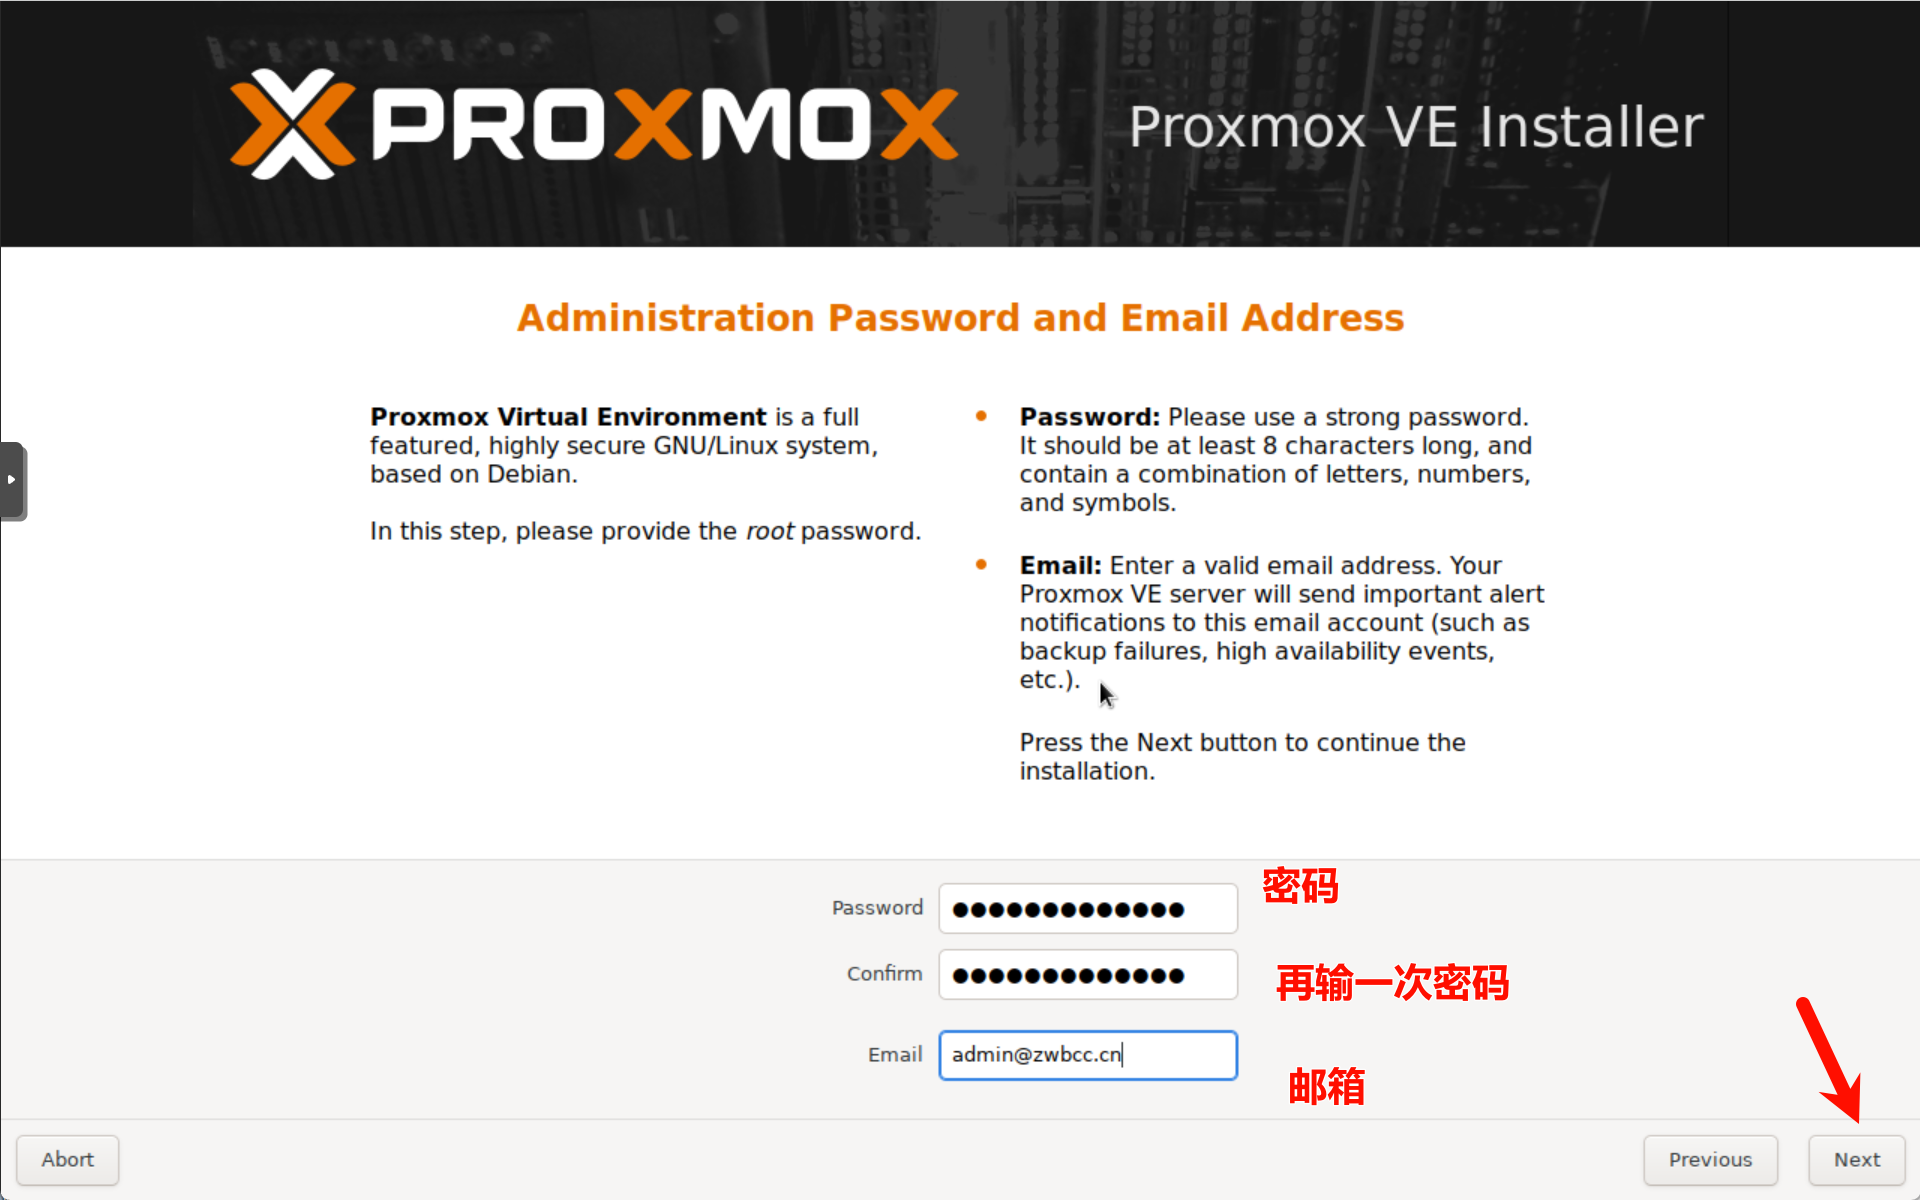
6、设置密码、和邮箱,继续点击Next(下一步)。
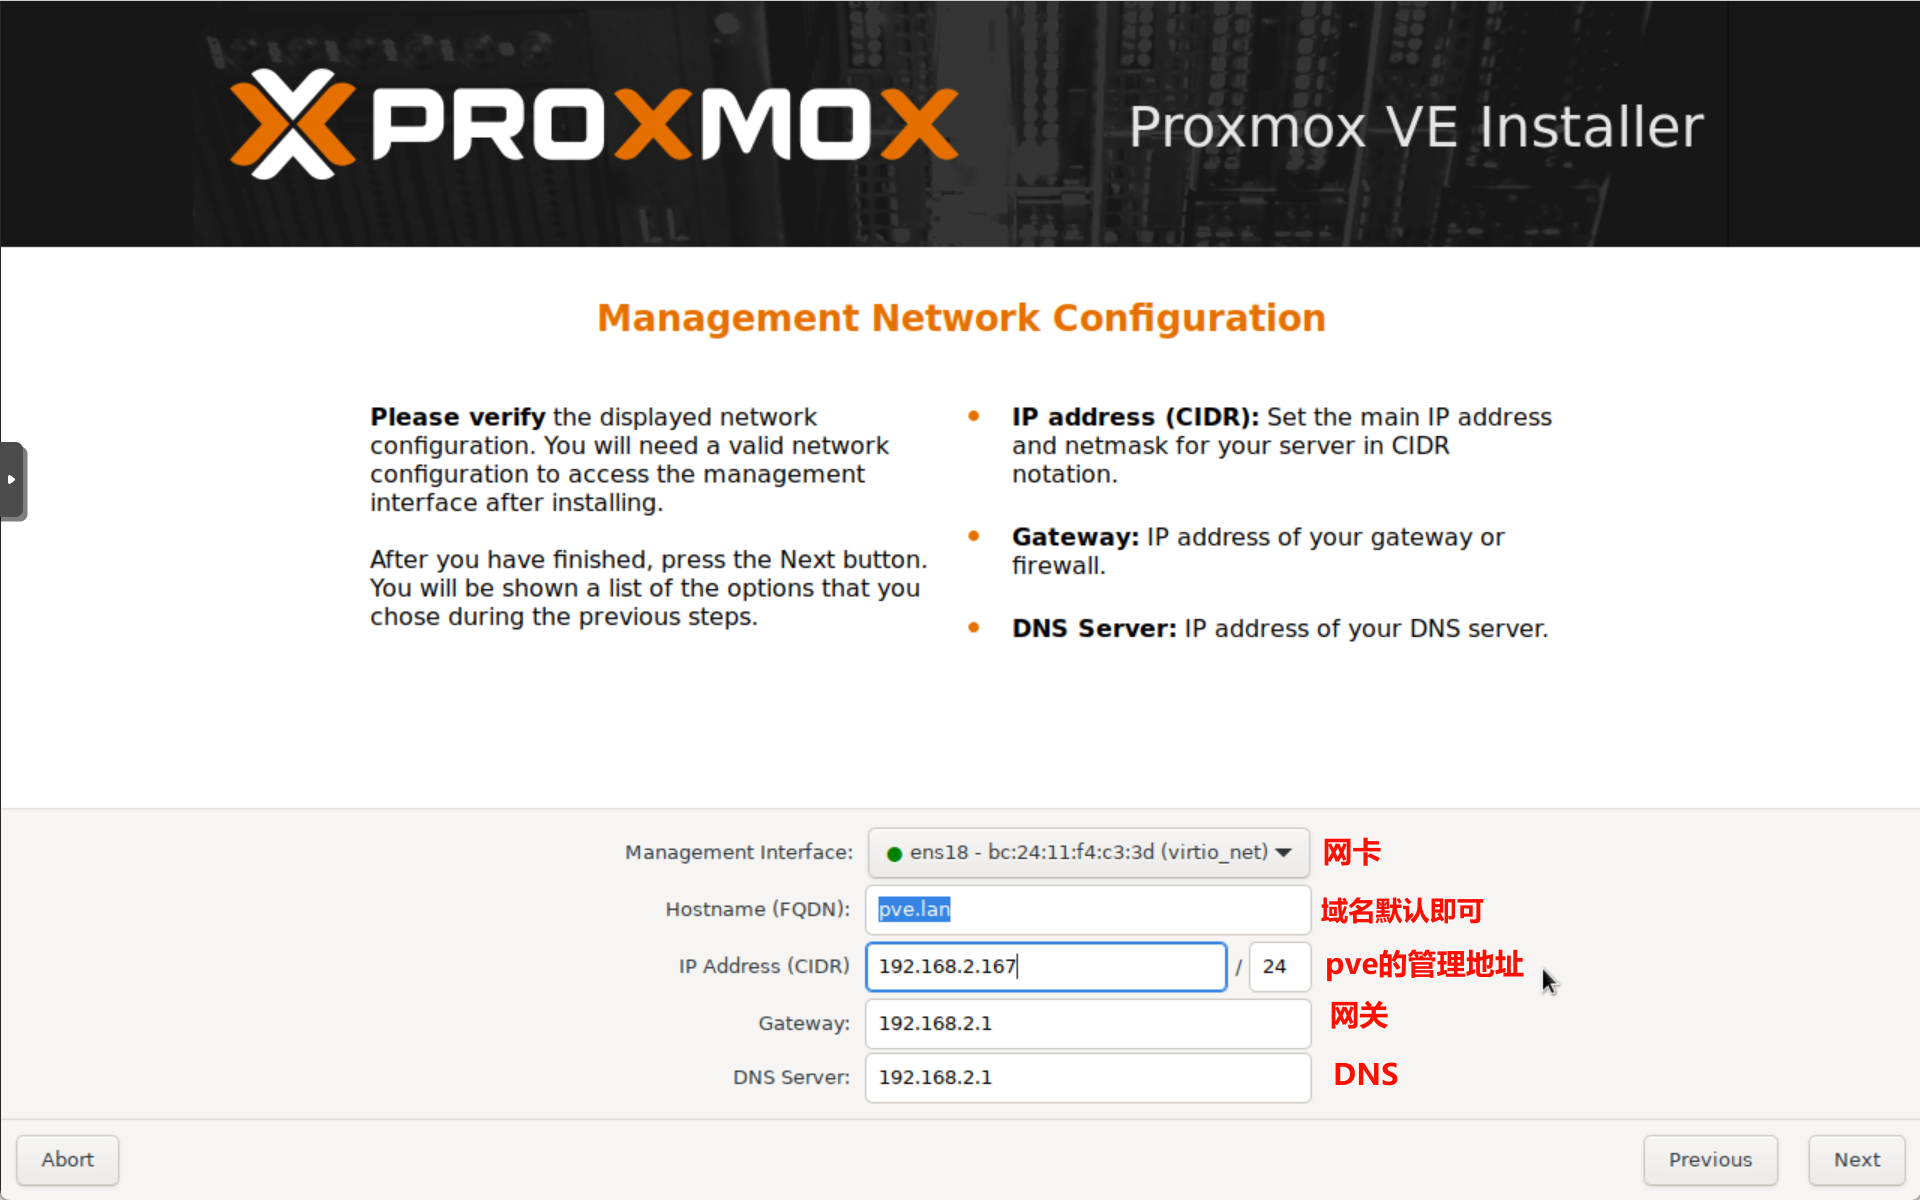
7、设置网卡、域(保持默认即可)、PVE管理地址、网关、DNS等,继续点击Next(下一步)。
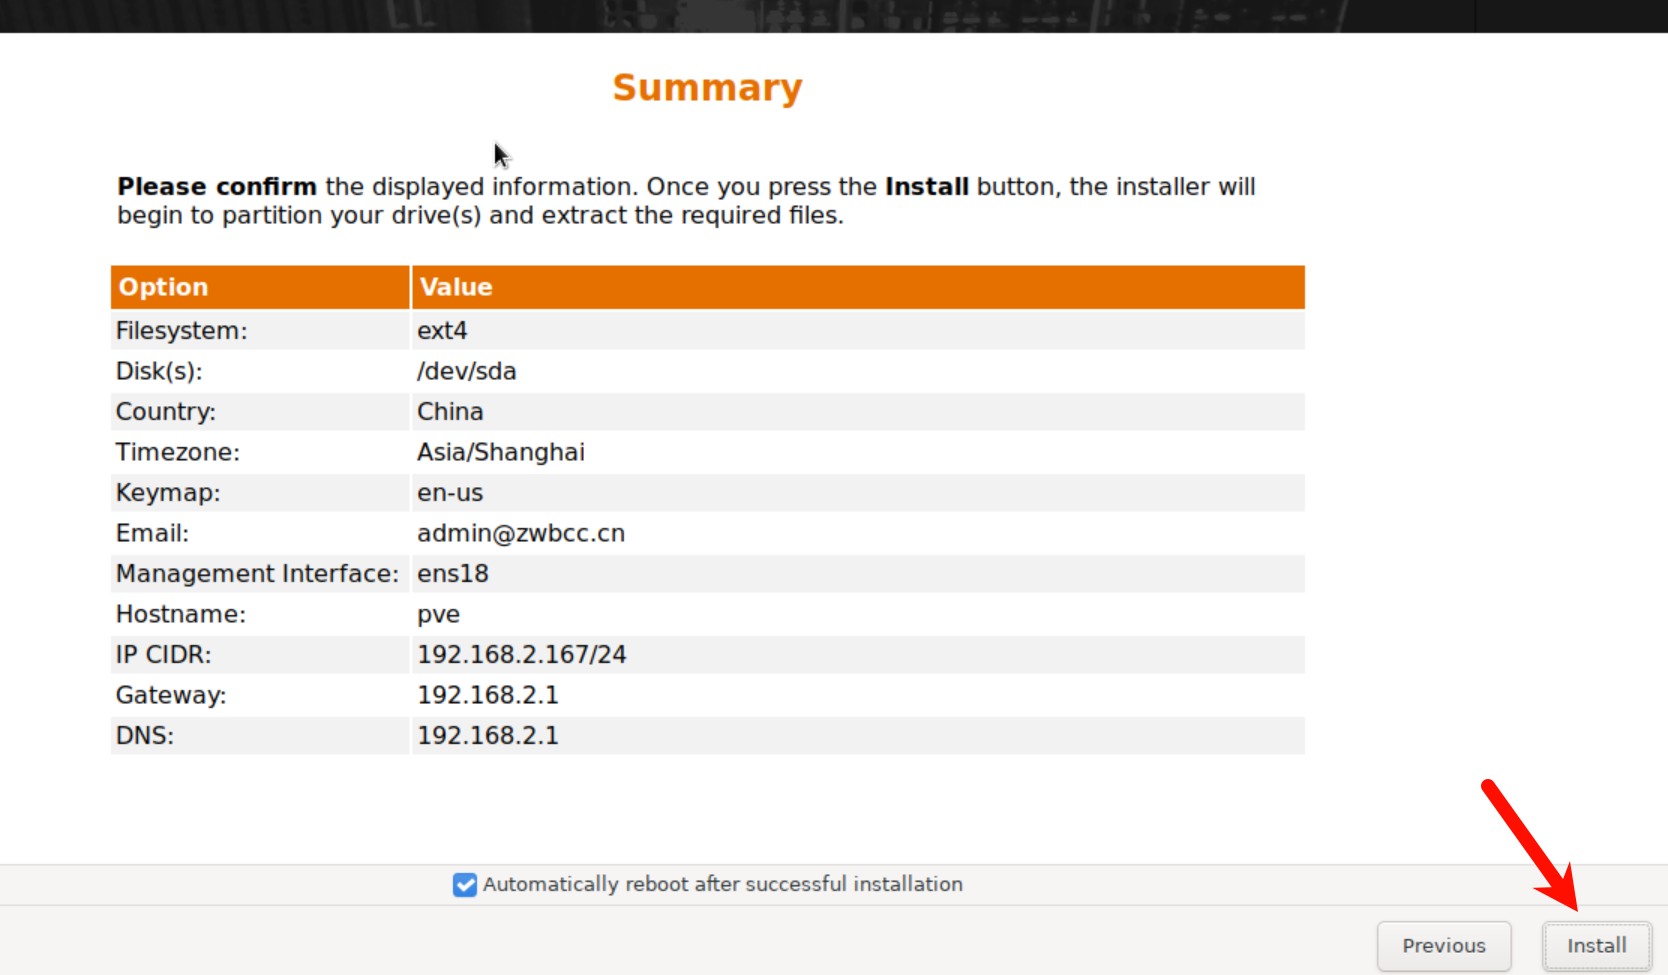
8、在配置详情中检查配置信息是否有误,没有问题点击Install(安装)。
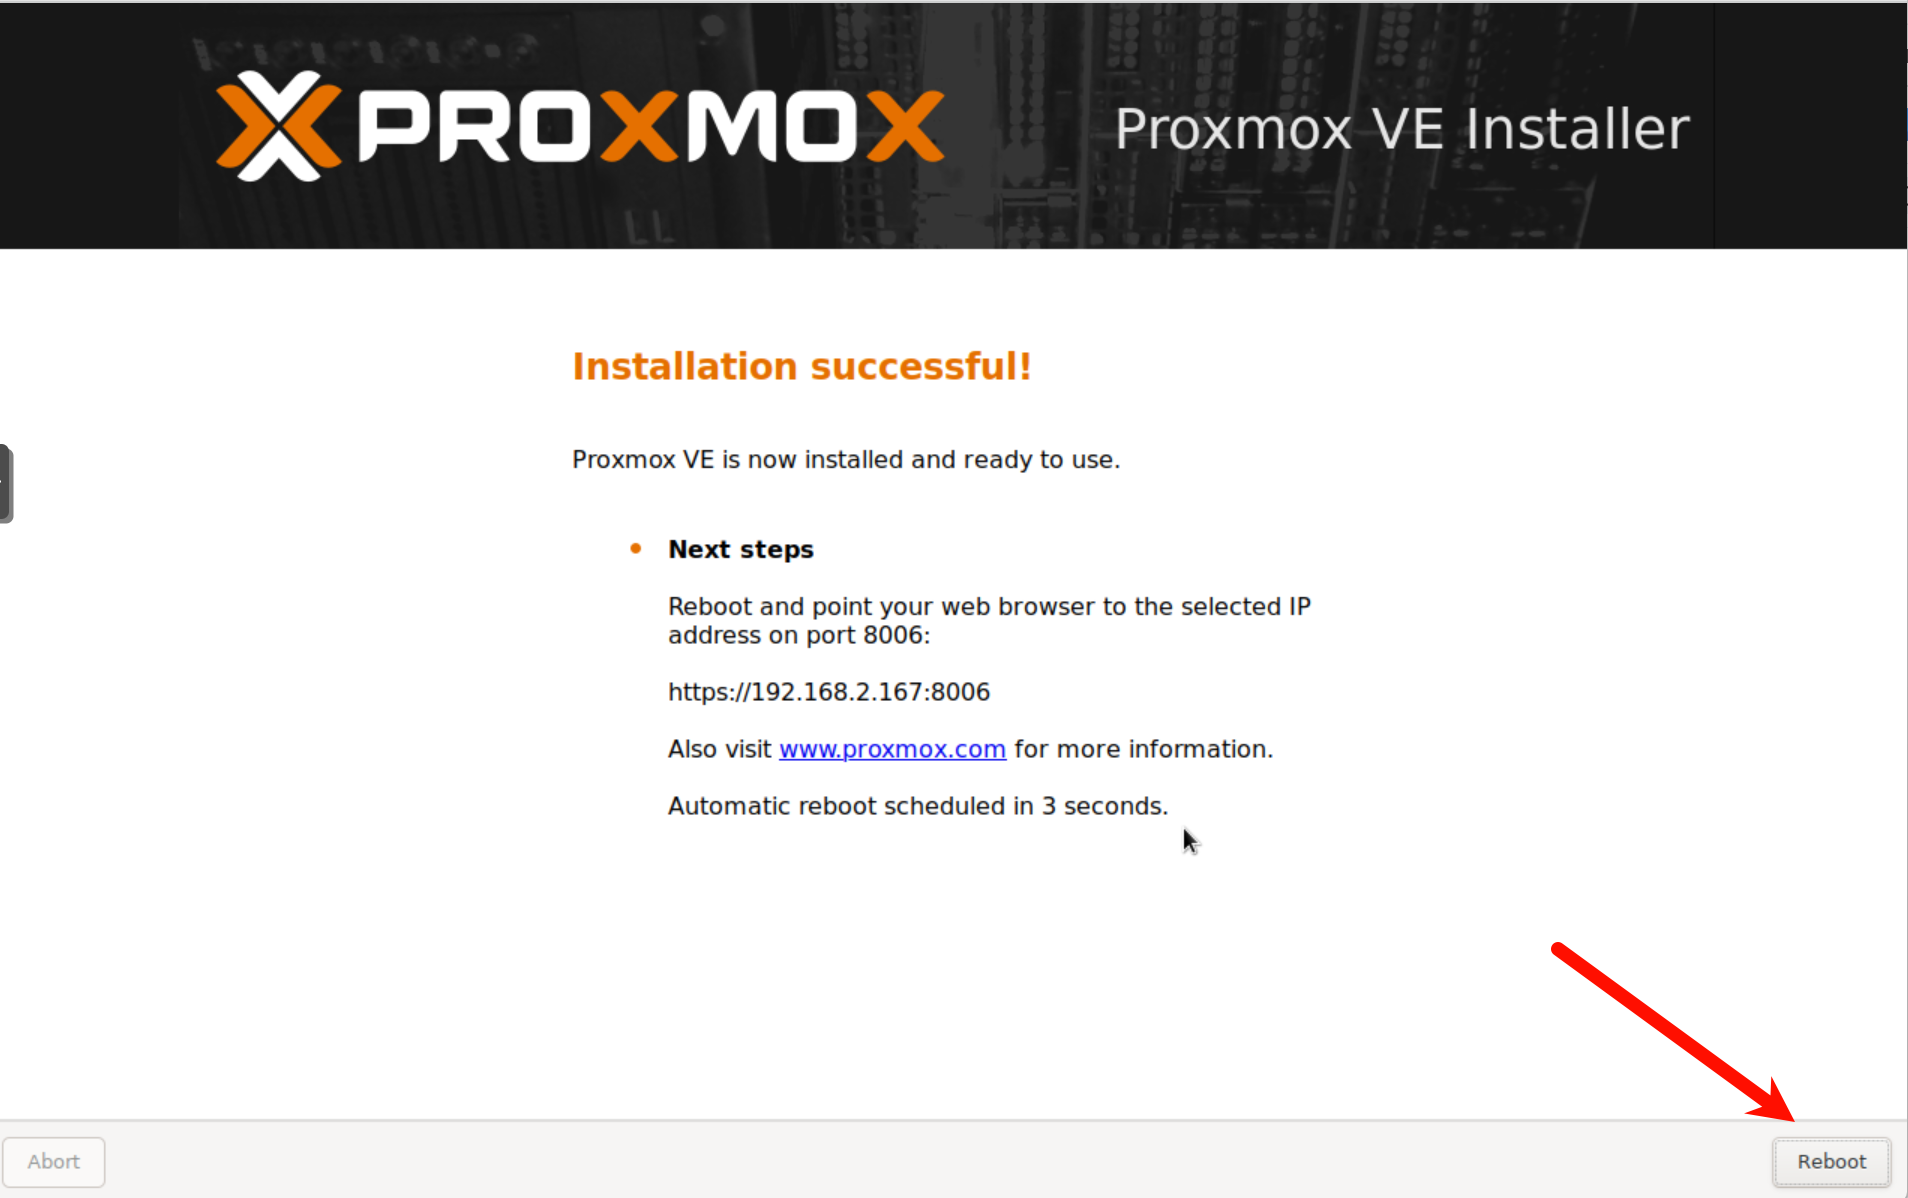
9、移除U盘,然后点击Reboot重启机器。
初始化
1、重启完成之后出现如下页面,表示安装成功,记录下屏幕中出现的ip地址,接下来的配置无需使用PVE主机显示,单个显示器的朋友可以将显示器切换到主机了。
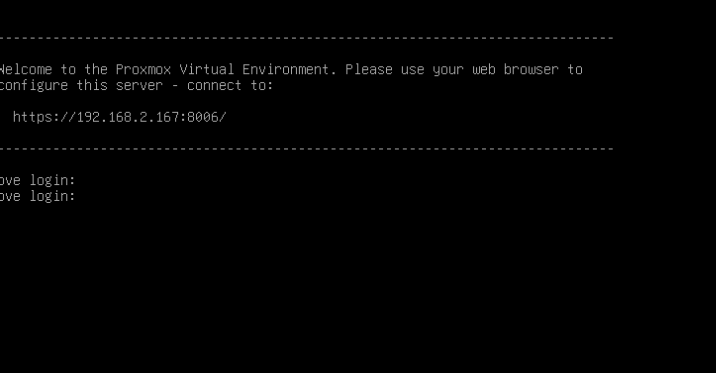
2、在浏览器输入https://192.168.2.167:8006 进入PVE配置页面,用户名为root,密码为在安装过程中设置的,语言为了方便设置为简体中文,然后点击登录。
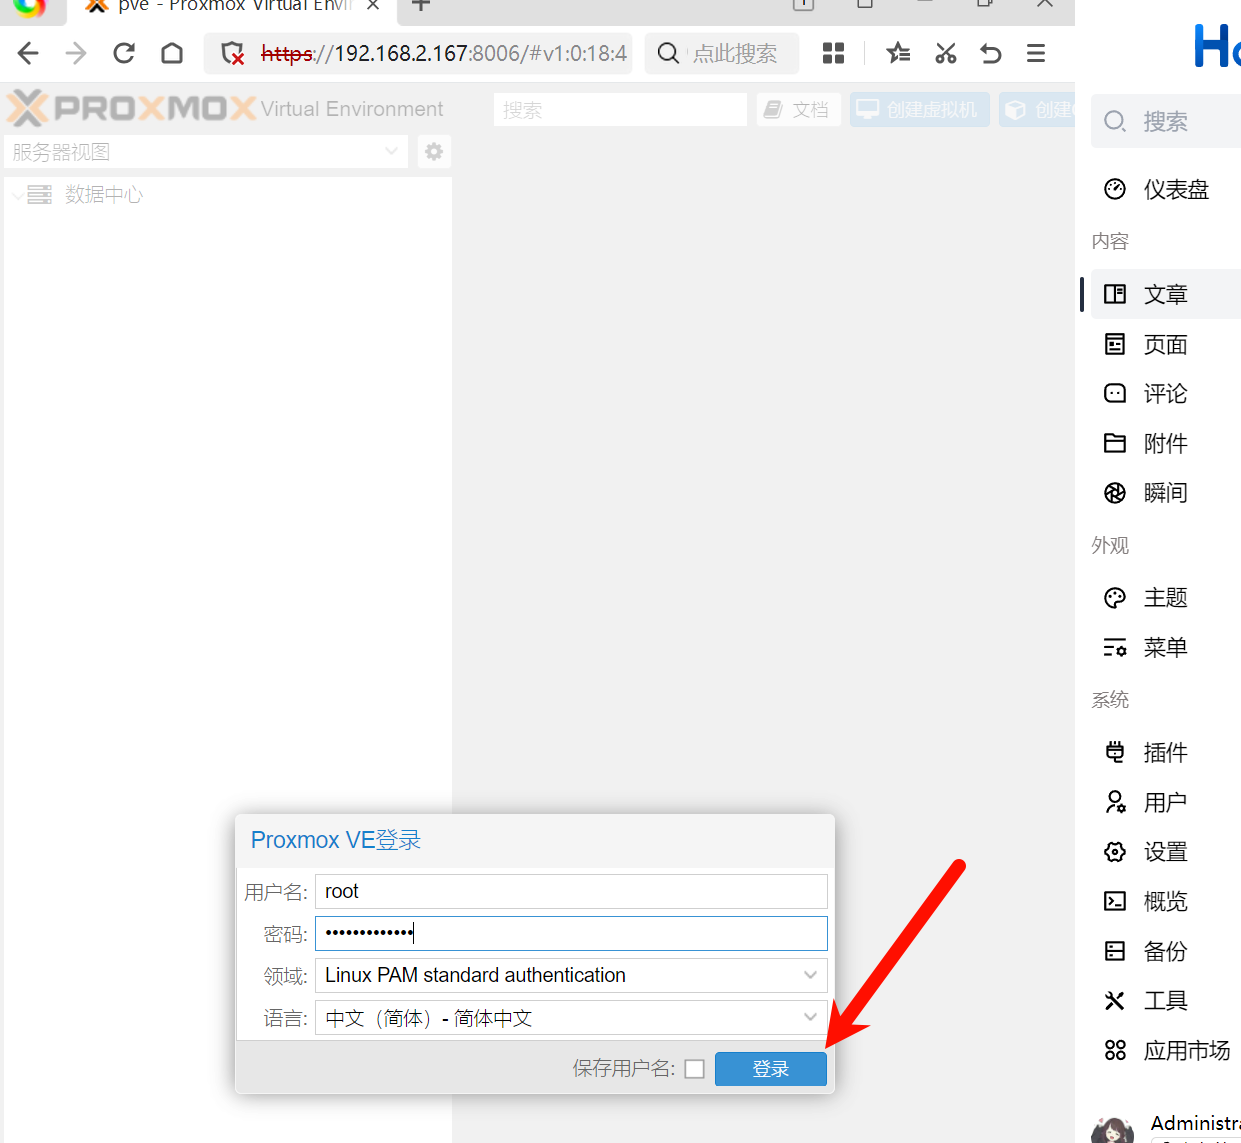
3、第一次登录会出现无效订阅不用管,直接点击确定,后续我们将通过设置去掉这个选项。

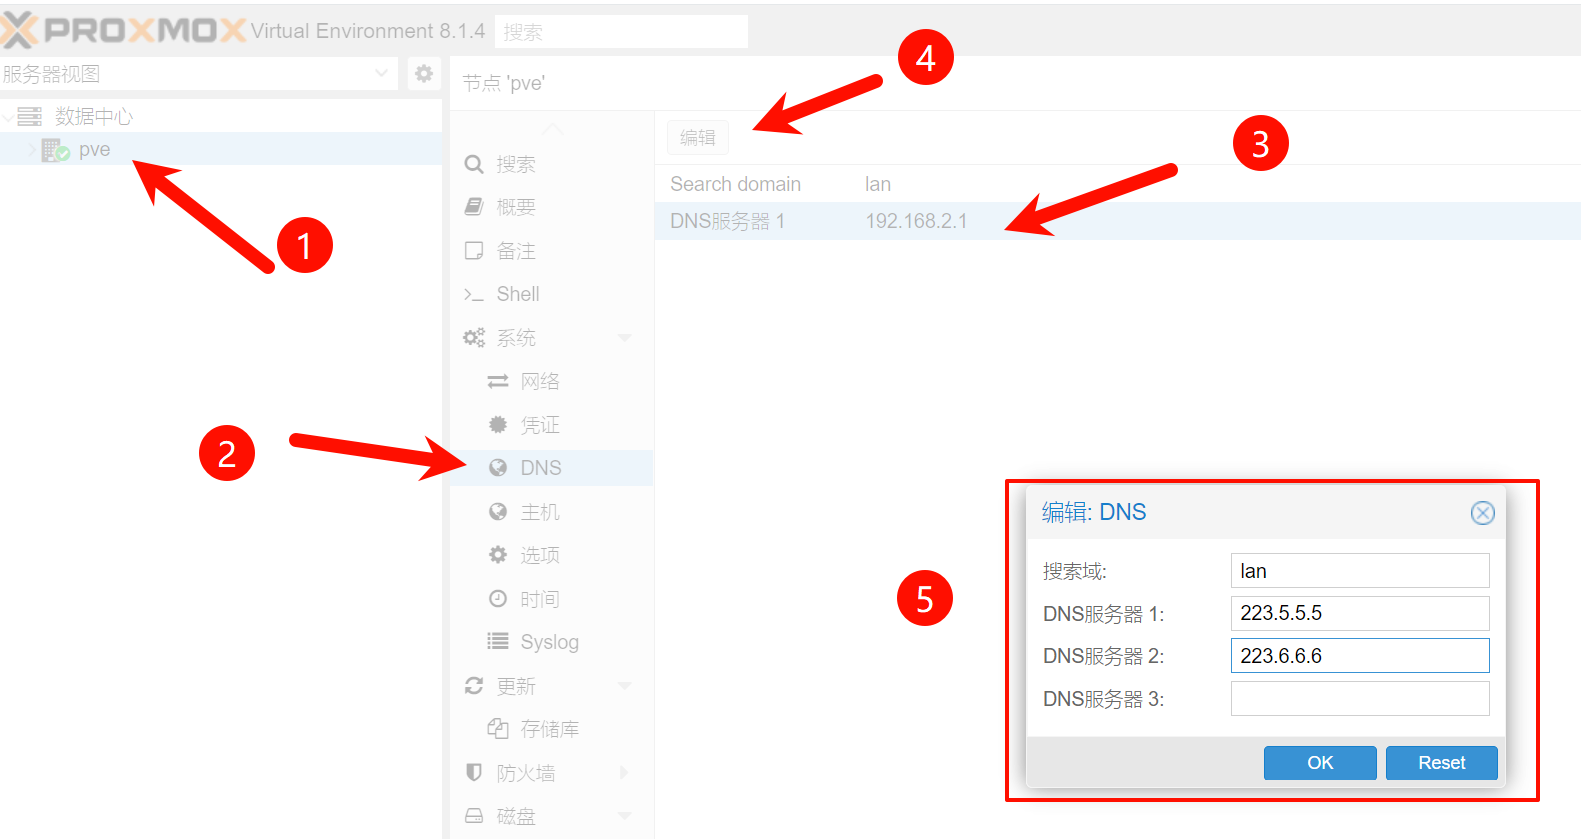
4、首先我们需要配置一下pve的dns来保证pve可以正确访问到网络,这里我使用了阿里云公共的DNS,223.5.5.5,223.6.6.6,然后点击ok。
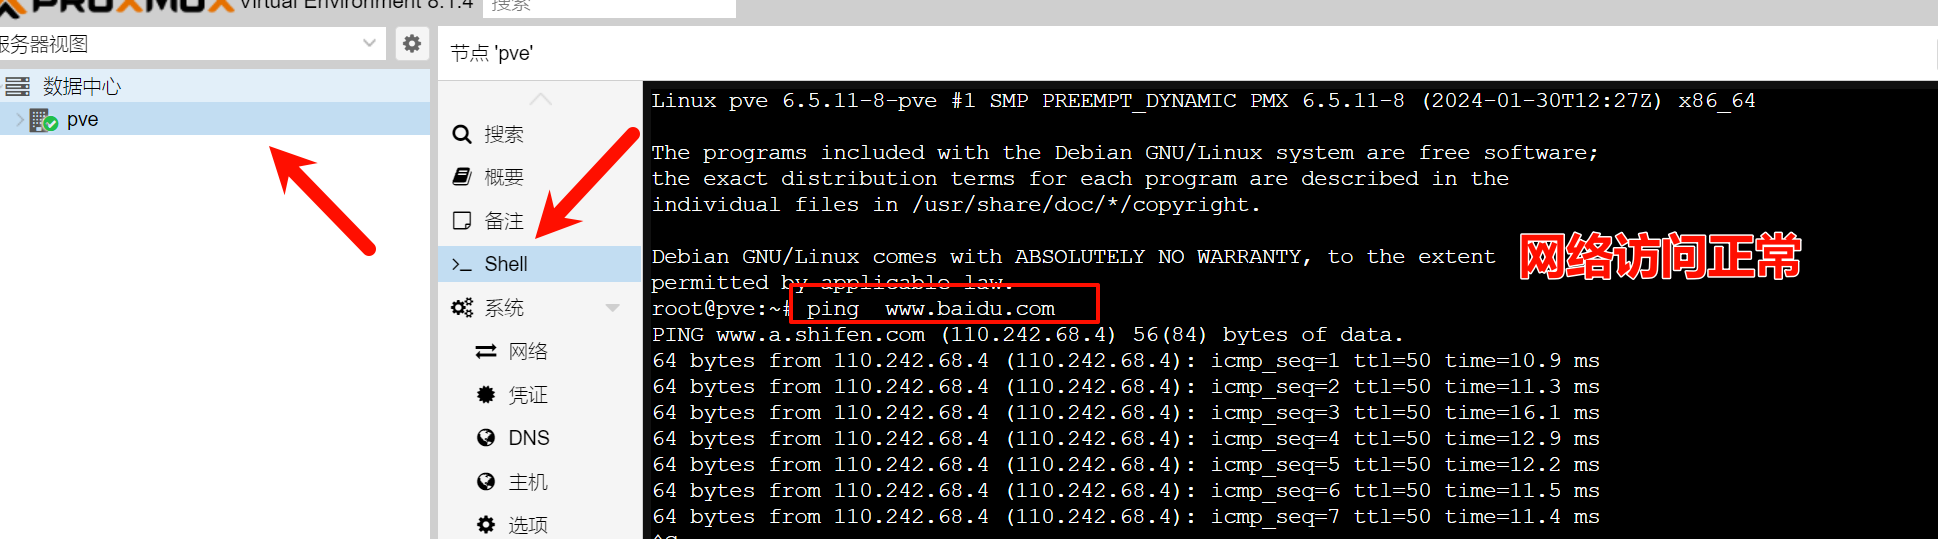
5、使用pve自带的shell工具来ping百度,测试网络是否正常,出现正确的ping值表示外网访问通畅。
6、接下来还涉及到pve的换源、系统更新、直通等操作,为了方便小白和第一次接触到pve的朋友们,这里我们将使用第三方工具来实现。
优化(PVE_Source)
pve_source是老虎大佬开发的pve脚本(首发于X86派论坛 ),可以更方便的初始化PVE,无需使用复杂的命令,使用方法很简单,登录PVE,打开Shell粘贴如下命令。
wget -q -O /root/pve_source.tar.gz 'https://bbs.x86pi.cn/file/topic/2023-11-28/file/01ac88d7d2b840cb88c15cb5e19d4305b2.gz' && tar zxvf /root/pve_source.tar.gz && /root/./pve_source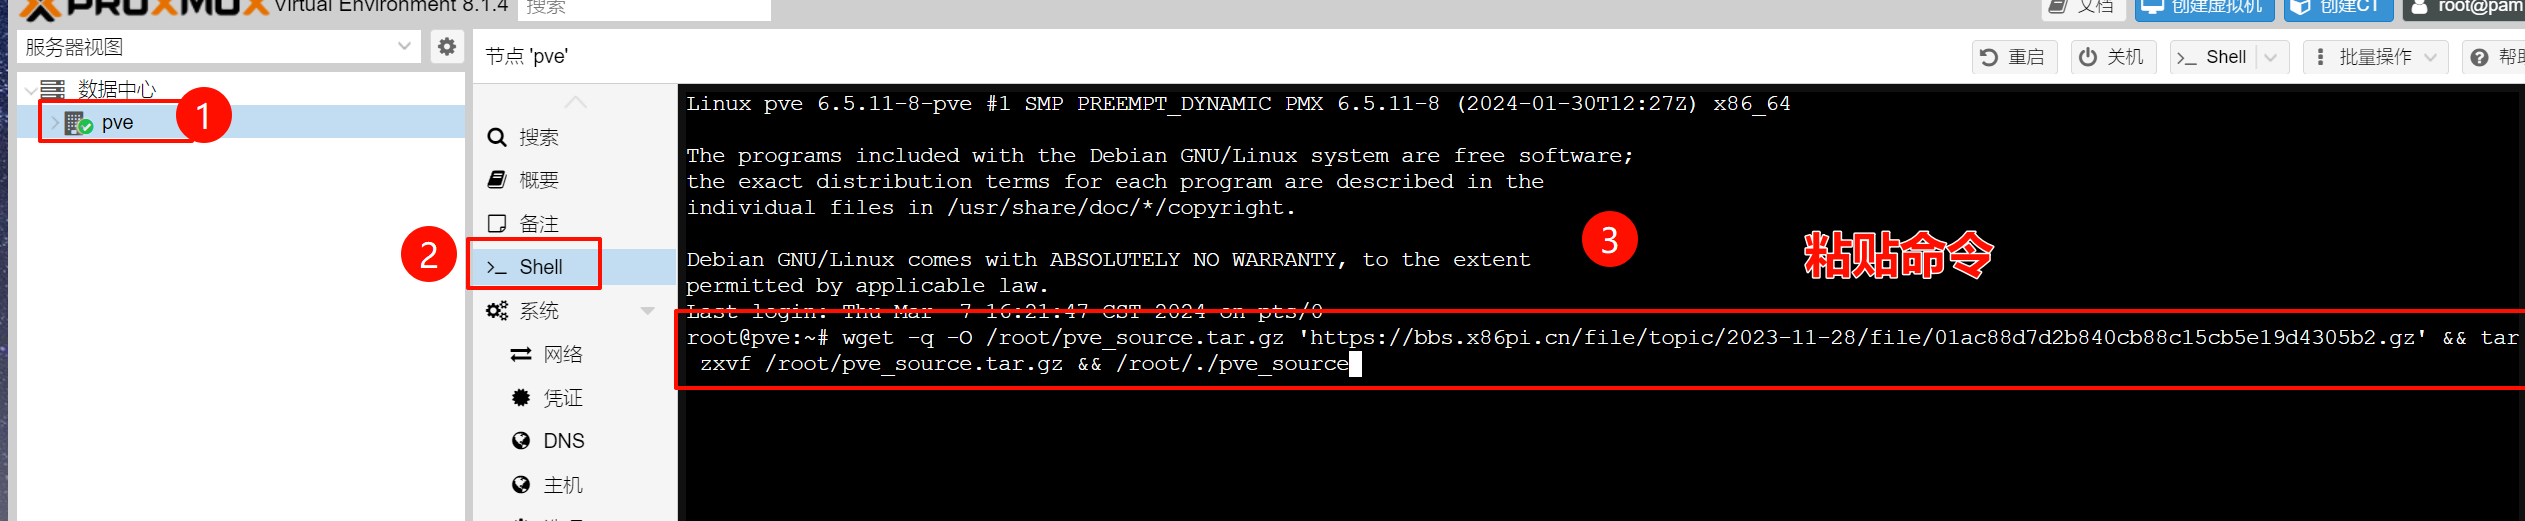
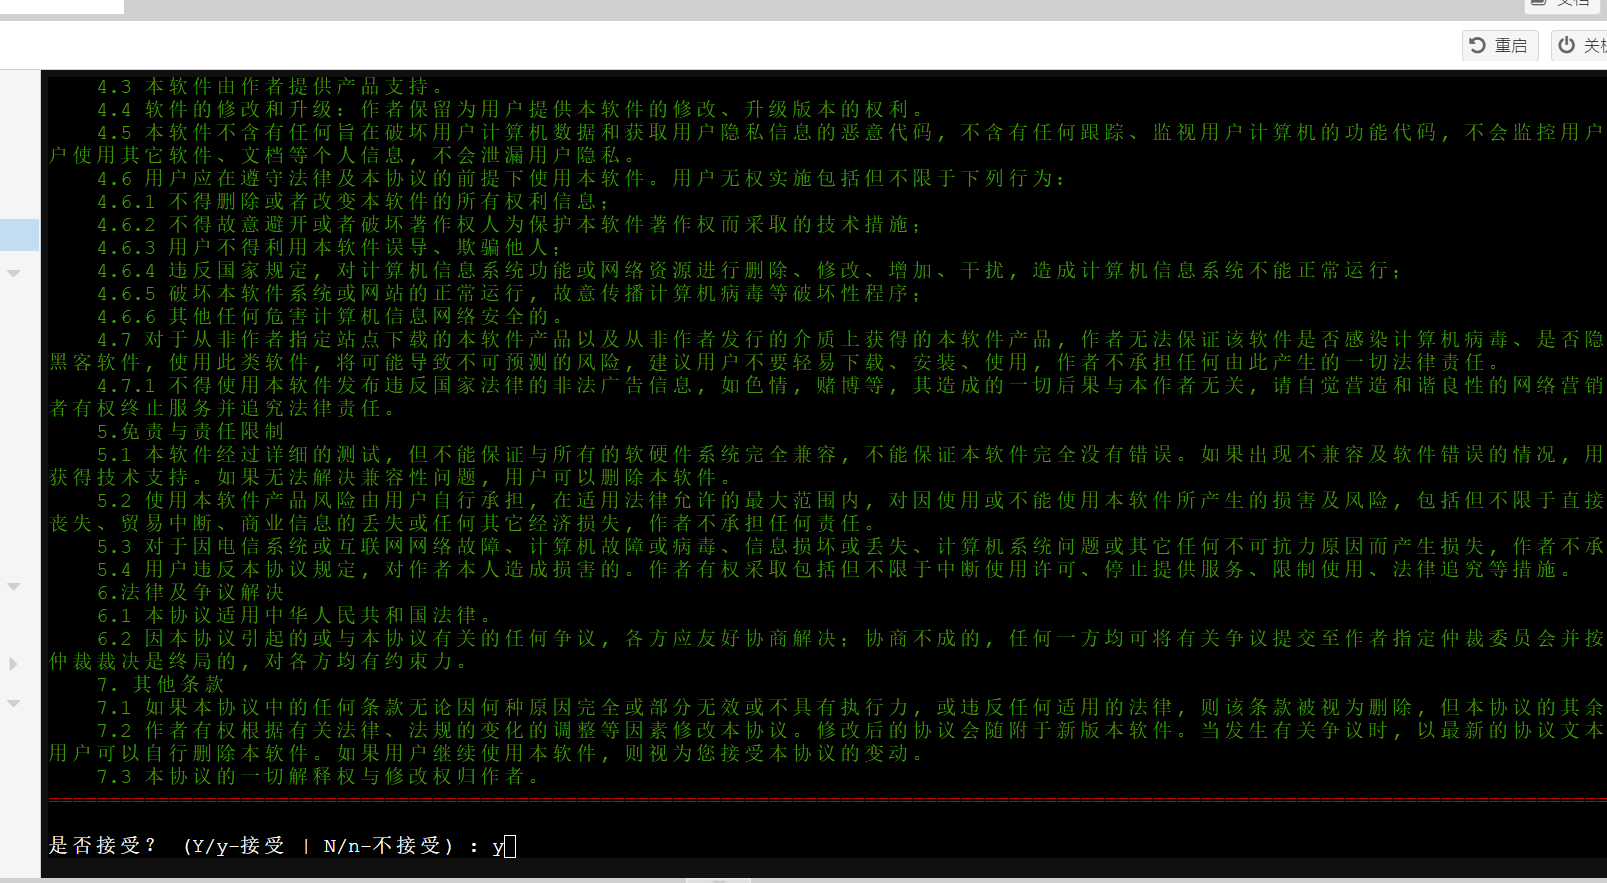
1、脚本加载成功出现使用协议,输入Y,然后继续按回车。
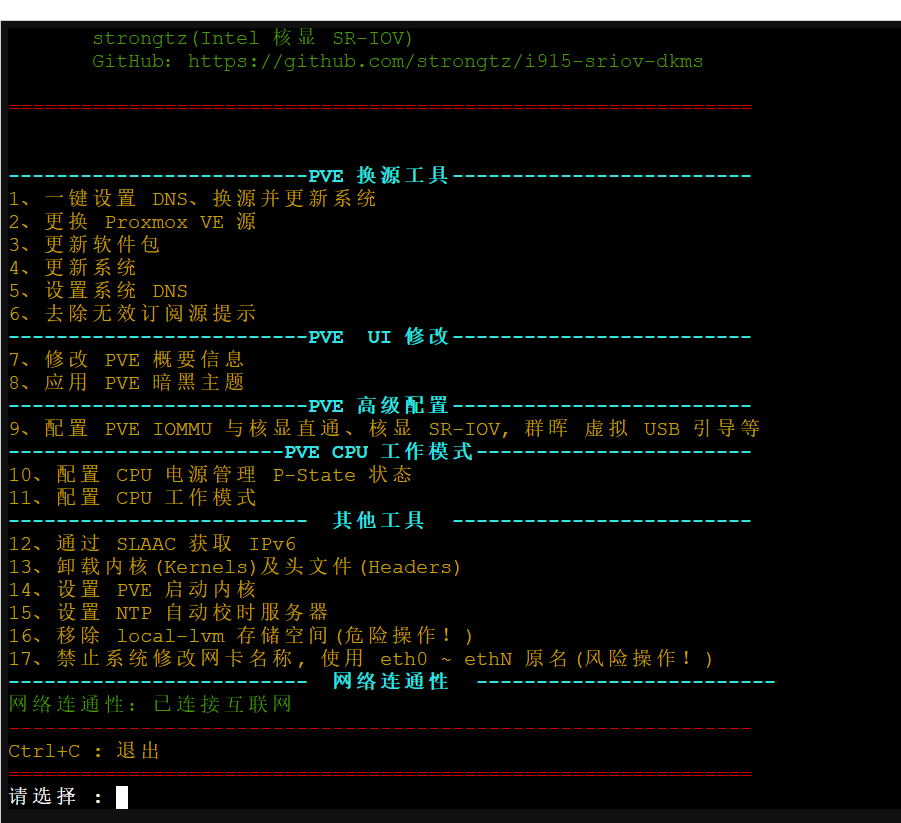
2、进入脚本优化选项,脚本覆盖了PVE的绝大部分必备优化选项,需要使用那个直接输入数字然后按回车即可。
更换 Proxmox VE 源
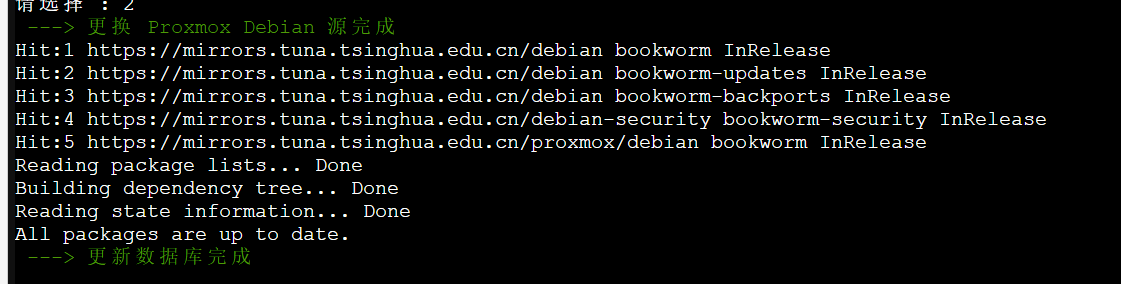
3、为了更方便了解脚本都干了什么,建议分步执行2\3\4\5\6,输入数字2,然后再输入1更换 PVE 软件源 + Debian 源,分别输入列表前面的数字选择PVE版本和软件源镜像站(不清楚的直接都选择清华大学源就行)。

4、选择软件源以后继续按回车执行,脚本将自动执行更换源成功后会给出提示。
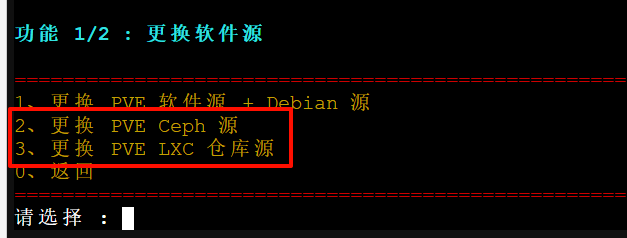
5、按照以上操作继续完成PVE Ceph 源 、PVE LXC 仓库源 的更新操作(在Shell页面输入./pve_source即可再次调出pve工具小技巧直接输入./pve然后按tab按键可自动补全后面)。
更新软件包\系统
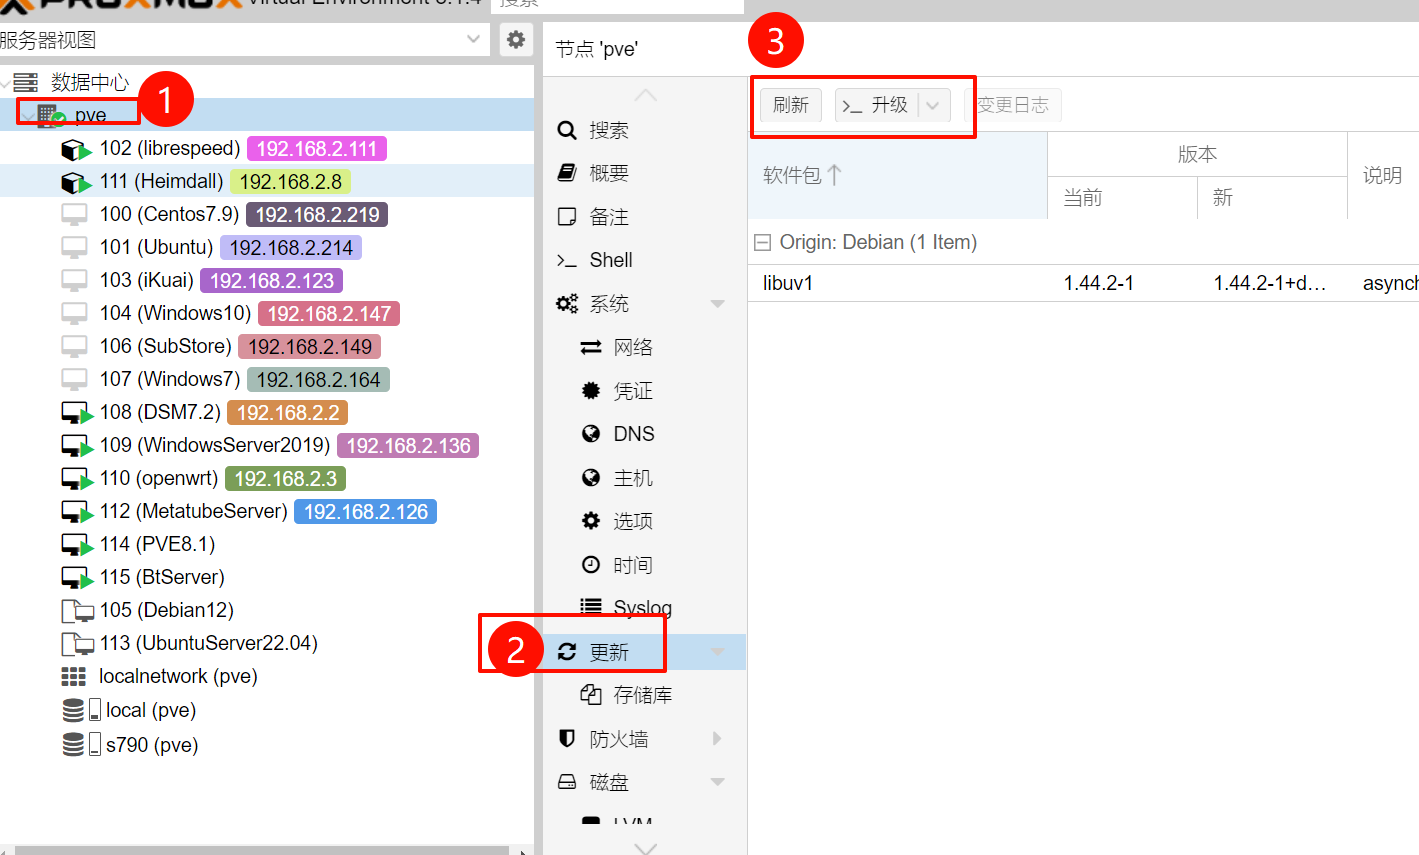
更新软件包有两种方法,一种是通过pve工具箱更新,另外一种因为在前面我们已经通过pve工具箱更新了软件源,所以直接在web页面更新也可以
1、点击pve节点→更新→刷新→升级,既可以完成最新软件包和组件的升级。
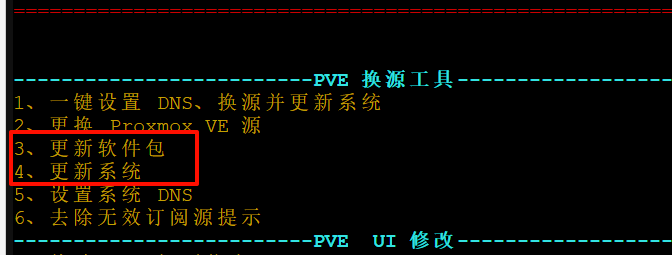
2、通过pve工具升级,在Shell中输入./pve_source,然后使用脚本3、4来更新软件包和系统。
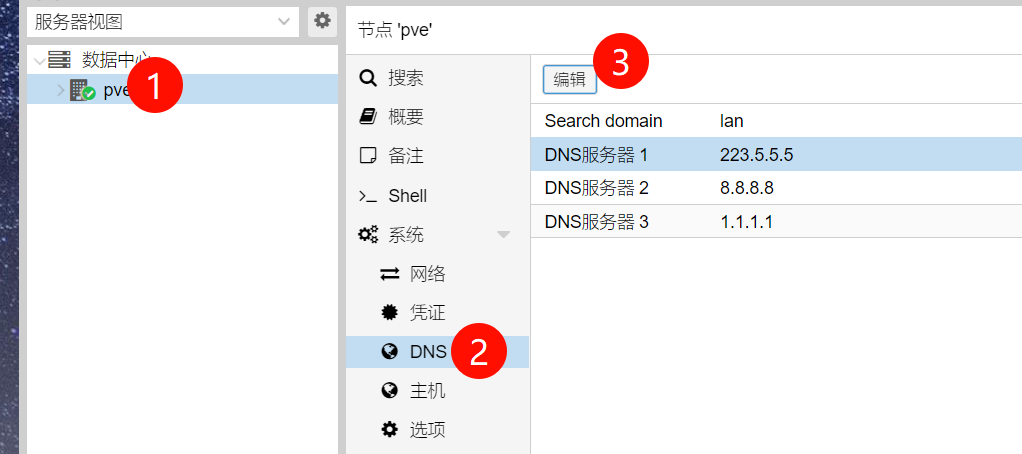
设置系统DNS
1、通过web页面修改,点击节点→DNS→编辑。
2、通过pve工具箱修改。

去除无效订阅源提示
每次在登录pve的时候会弹出企业订阅提示,对于普通用户我们直接去除掉弹窗即可,登录PVE,在Shell窗口中输入./pve_source,进入pve工具箱,输入6,系统会自动执行去除订阅脚本,脚本运行完成后请强制刷新浏览器缓存。

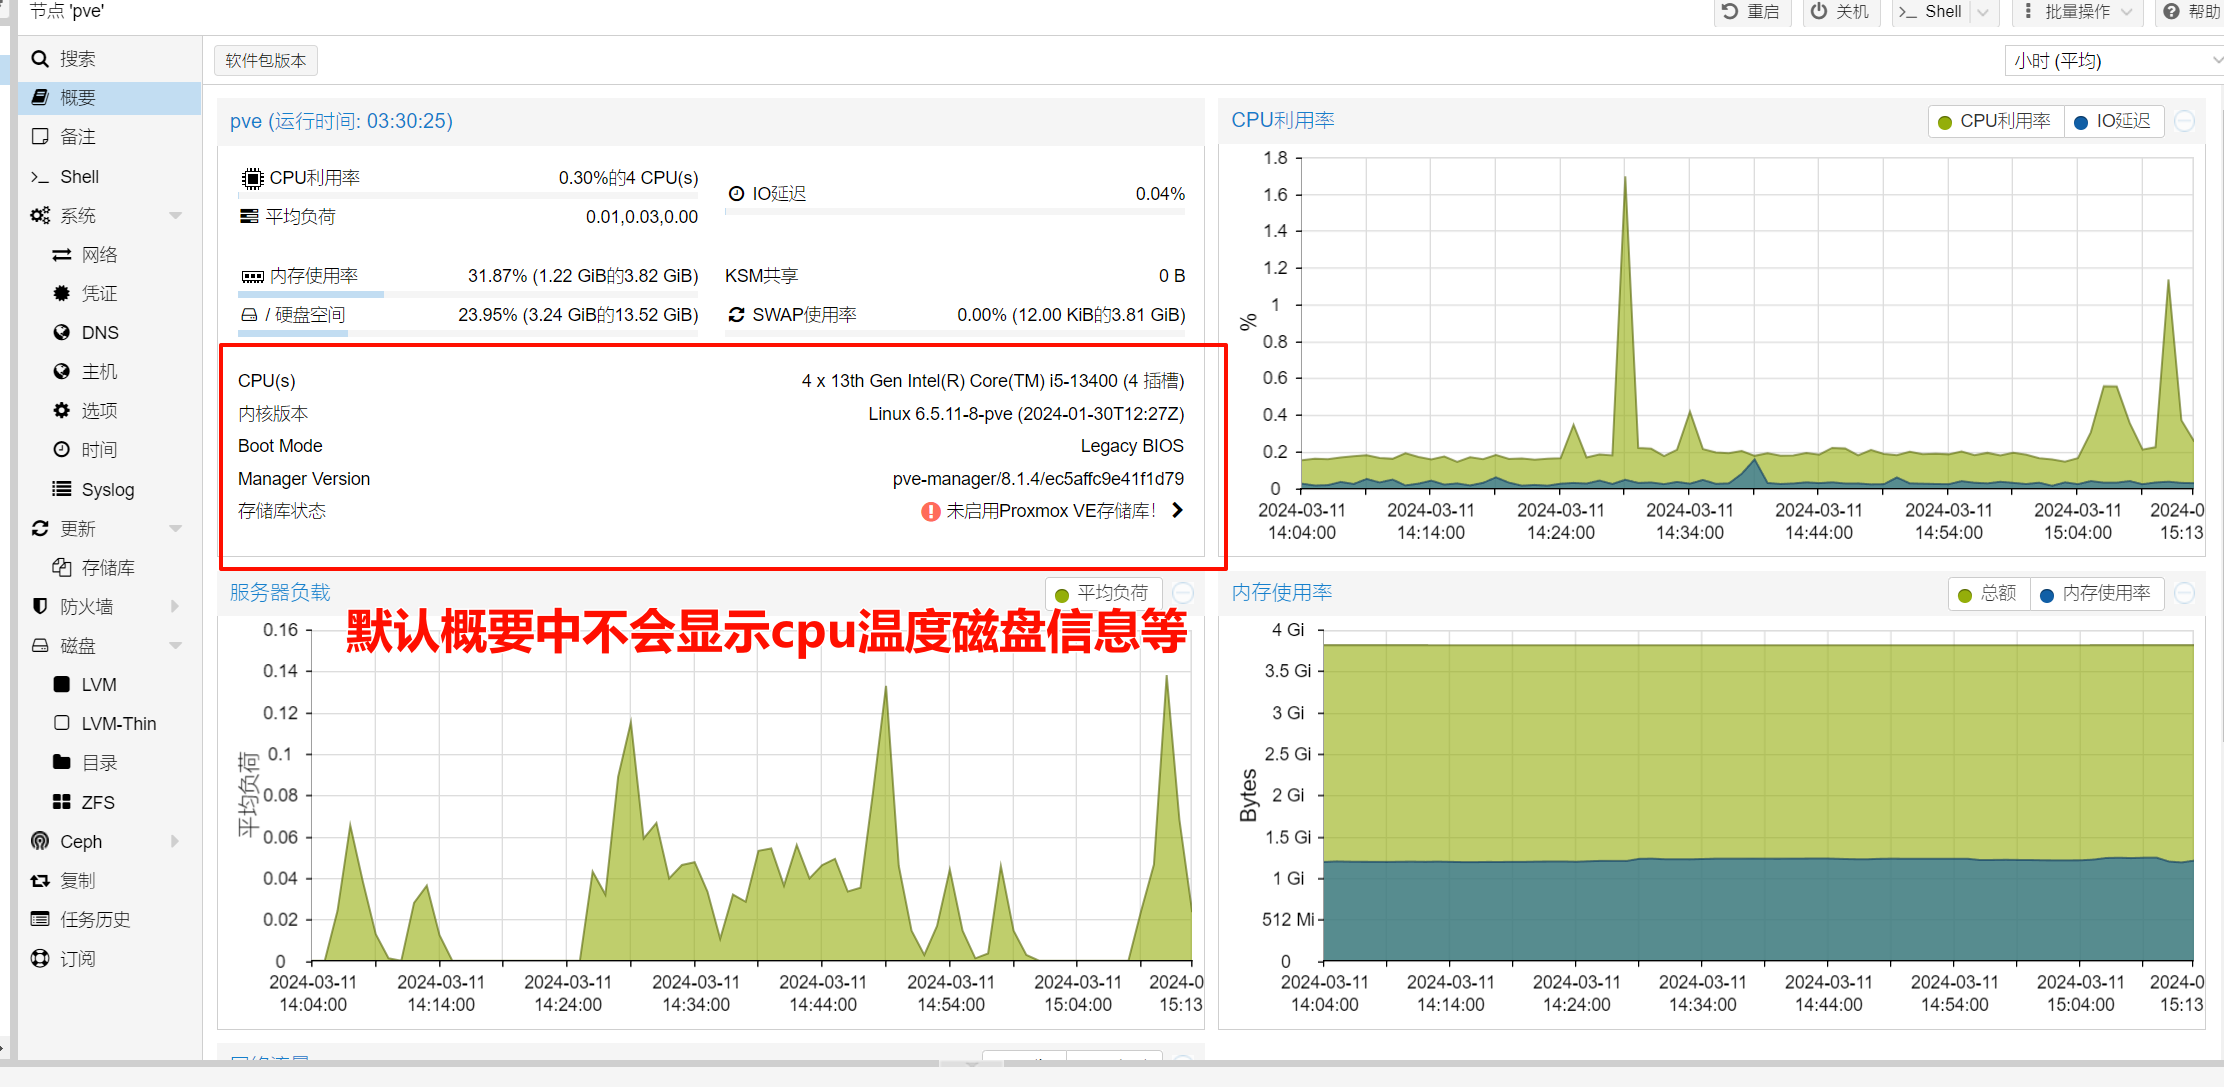
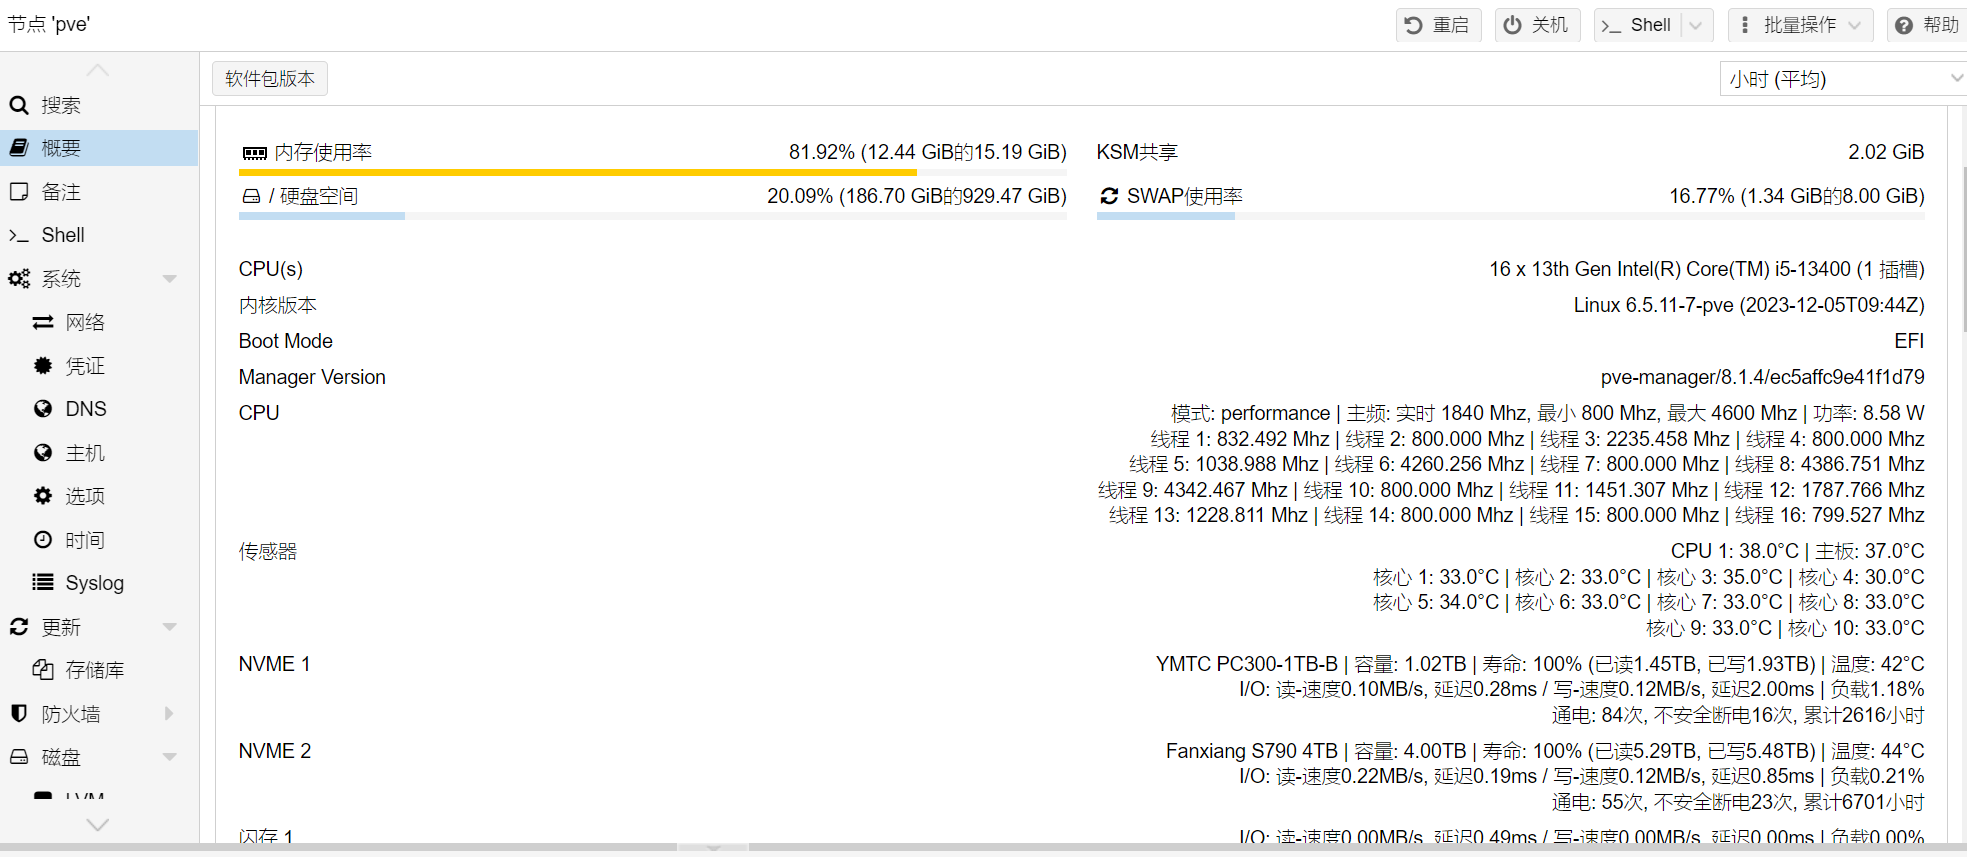
修改PVE概要信息
1、pve默认概要中不会显示cpu温度、硬盘信息等,通过pve工具箱可以修改信息概要页面,使其信息显示更加完善。
2、登录PVE,在Shell窗口中输入./pve_source,进入pve工具箱,按7进入pve概要信息定制向导,根据自身喜好选择合适的版本,这里我使用推荐方案1:高大全版本。

3、修改改完成后可以看到概要信息中显示的非常全面,包括CPU温度核心占用情况,以及硬盘的温度写入量等都可以很直观的显示。
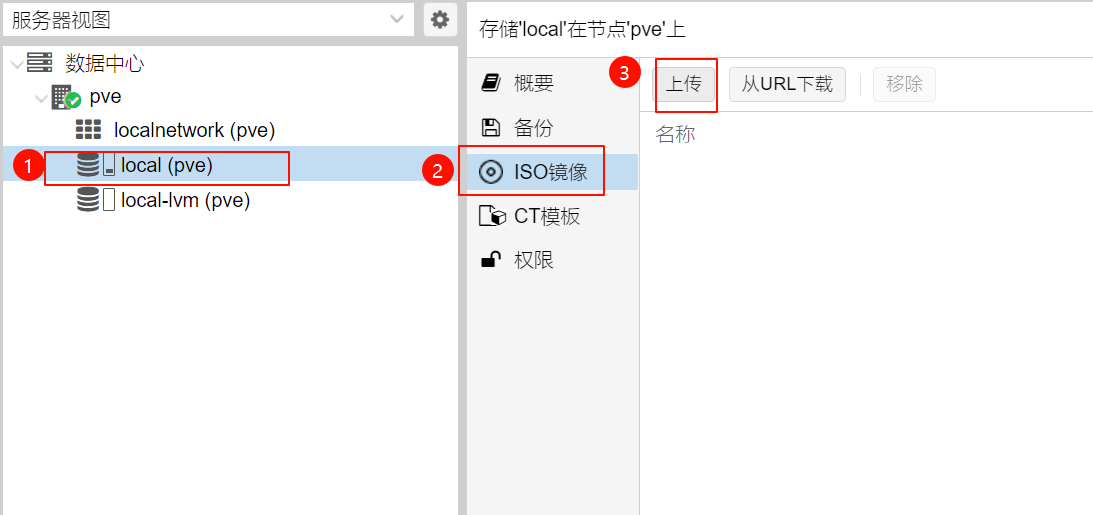
虚拟机安装
pve安装虚拟机还是非常简单的,本篇我们将使用pve安装win10来演示一下安装过程,其他系统安装大同小异。
1、首先需要上传安装镜像,通过local(pve)→ISO镜像→上传,将win10镜像上传到pve中。
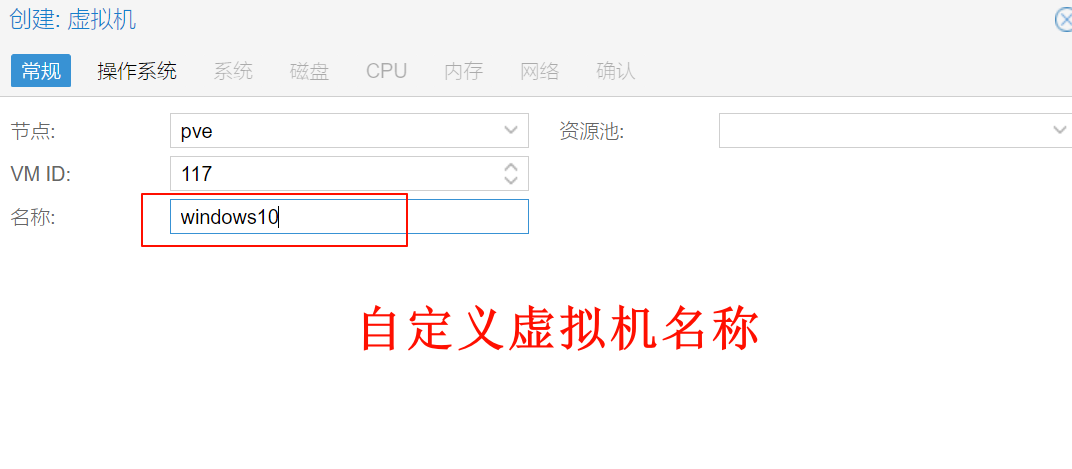
2、回到pve首页,点击右上角的创建虚拟机,常规中自定义虚拟机的名称
3、操作系统中选择windows10镜像,然后在类型中选择安装操作系统的类型,注意版本也要选择。

4、系统保持默认即可。

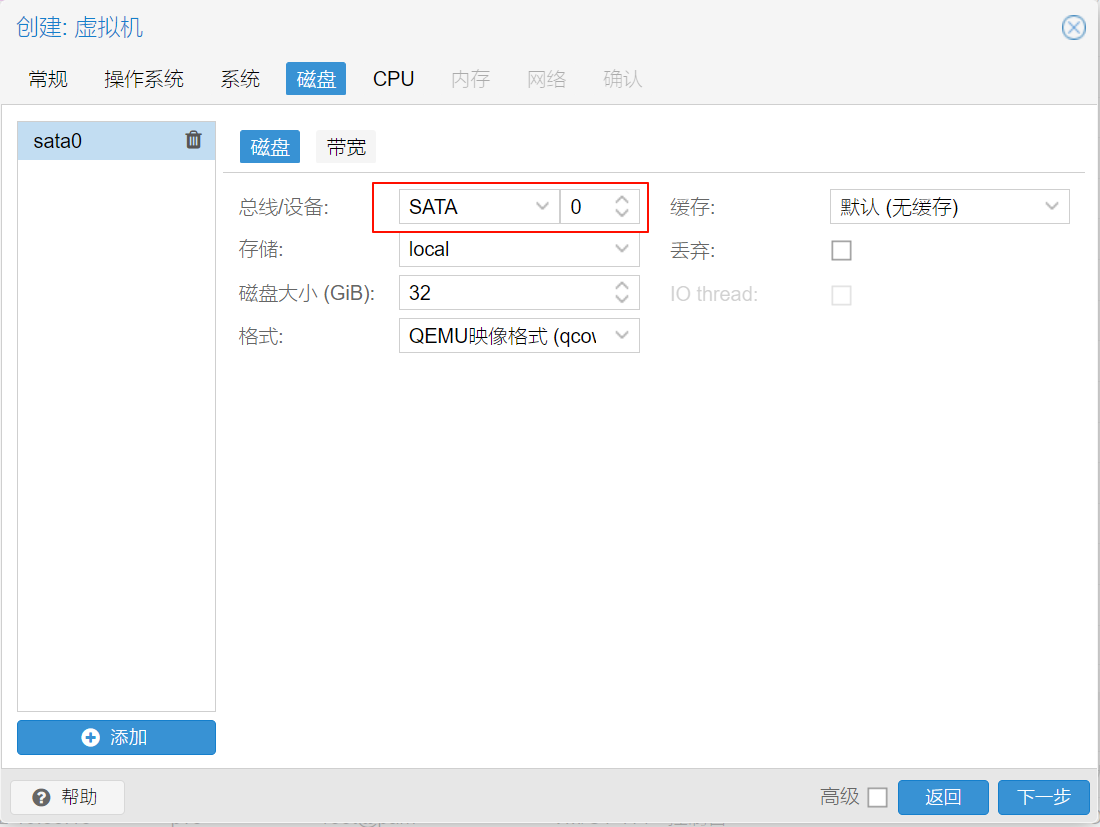
5、硬盘中总线选择sata,其他保持默认。
6、CPU根据机器配置选择,插槽表示cpu个数单CPU机器输入1,核心根据CPU选择,类别使用HOST系统性能最大化。

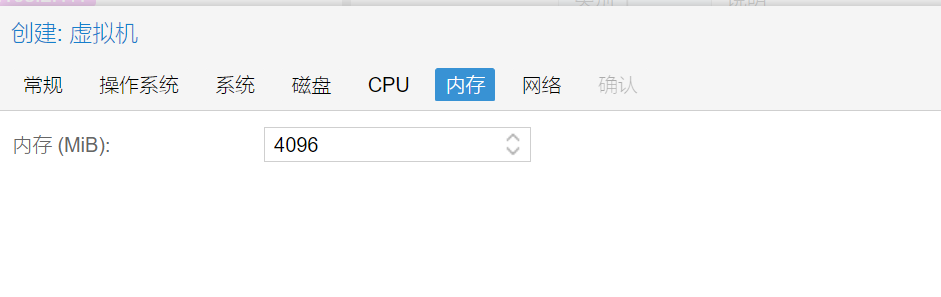
7、内存根据机器配置设置。
8、网络设置中选择兼容性最高的e1000即可。

9、最后检查配置没有,确认无误后点击完成。

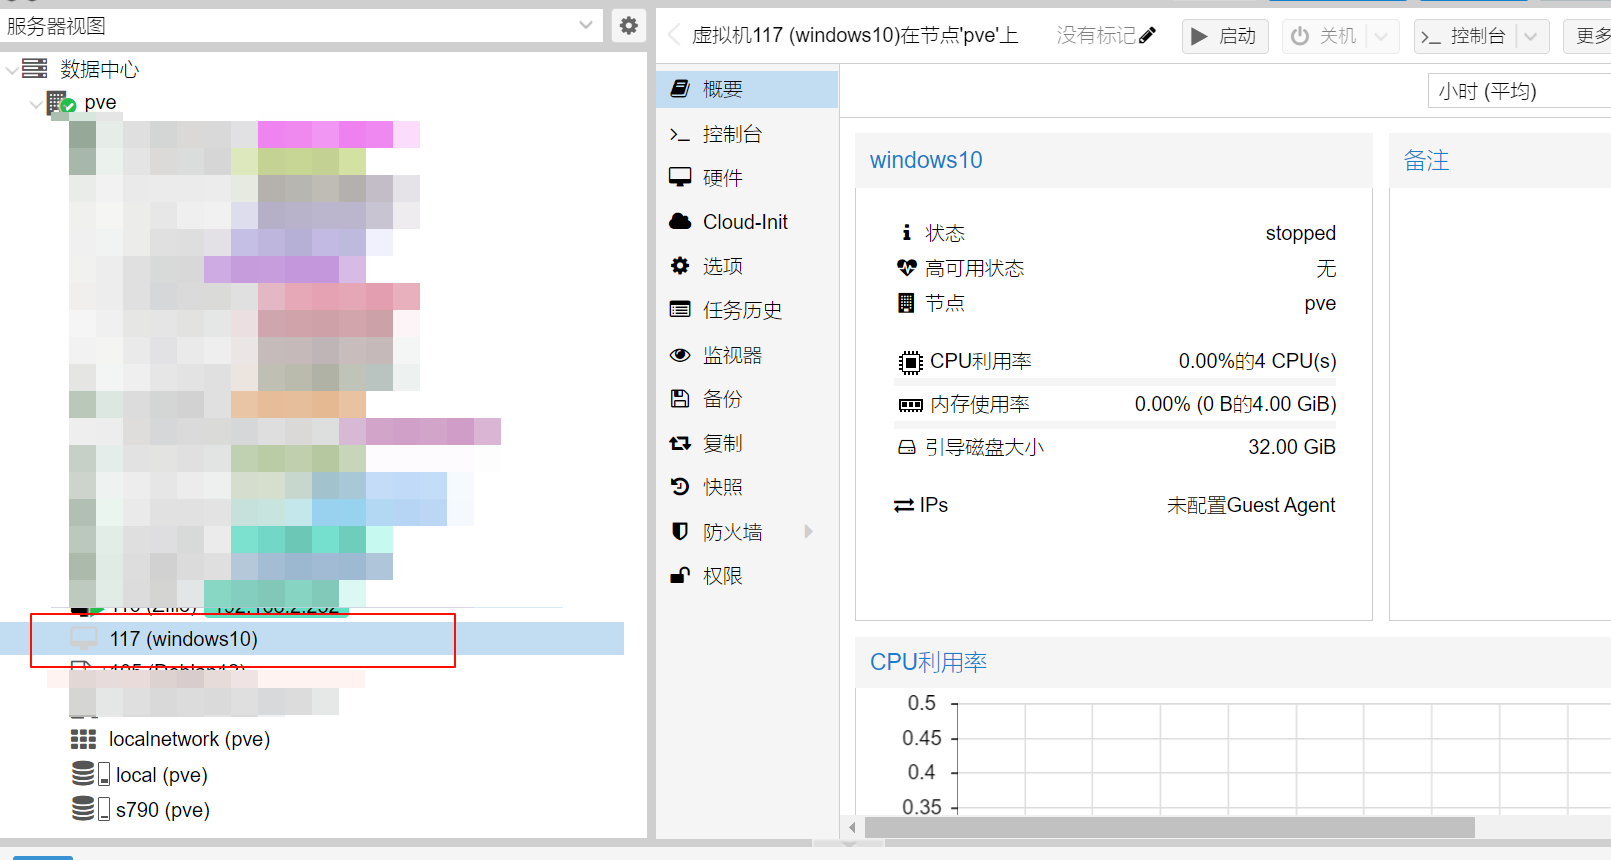
10、稍等几秒,机器创建成功。
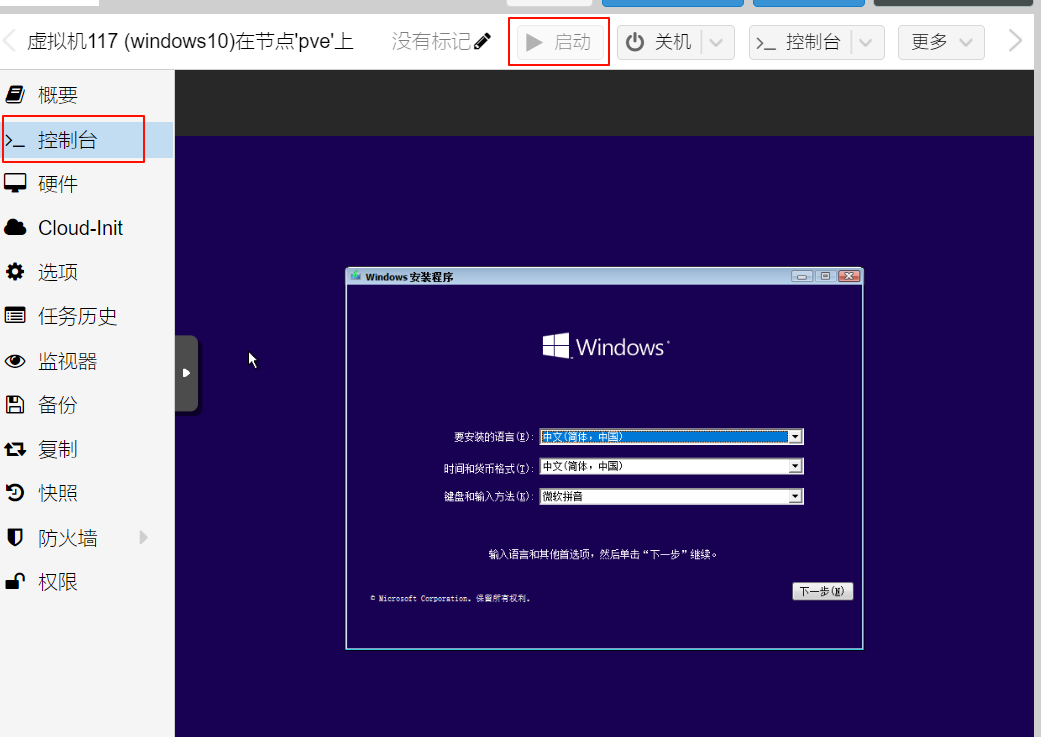
11、点击控制台启动,按照正常windows系统安装流程安装即可。
总结
pve的安装过程还是比较简单的和一般的操作系统安装过程相同,安装完成后通过pve-source工具优化即可。